
Been away all this week but I did manage to get some time to finish off a few of the Maya tutorials so I wasn't completely lacking before Alan got around to grading. I have completely finished the Visual Effects section (at least all those that are possible). I would like to make a note of saying that the project files for the Render Layers 3 Tutorial are not on the blog so I couldn't do it.
In other news I had a minor issue with the muscle deforming tutorial I just could not understand why my bicep was wobbling through the mesh. I ended up removing the jiggle effect. I'm sure its a step I missed some ways back but TBH I did my best...
Anyway I do not plan to waffle on, everything else is complete in visual effects...
For the blend shapes videos I decided just to get the face moving and use that as my primary proof. The video was created using the blend shape deformers of mirrored faces to create missing emotions. From there I assigned them to the base face and blended the face into different amalgamations.
Next came the operation order video, there were soooo many emotions to choose from here so I just chose to animate the ones not covered in the first video. These consisted of mouth movements using visual phonemes or as people on the CG world know them visimes. From this you can see the mouth creating numerous key patterns for speech.
Next was positive/negative corrective shapes, this was to allow functionality to a face that is deforming incorrectly. In this video the jaw would not stretch the cheeks so it was adjusted using a blend shape deformer that would automatically apply itself when a specific axis moved in a specific direction.
Stereo 3D cameras came next something which I was very keen to look into having never invested any time in 3D technology myself it was an eye opener. We were given a variety of choices but I could not give up the chance to create a moving video that works with 3D glasses... suffice to say this video worked for me not the best but I understand how it works...
Next was a brief return back to blend shapes but this time it was to use curve controls to create basic deformers. I had the option to create the opposing side using the mirror method established in the mirroring video but I wanted to get more comfortable with weight painting so I painted the opposing side and I think it turned out pretty well...
The Wire deformer video was a unique experience to say the least using curves once again to create deformation in a plane nurb object. Still it was a fun exercise I particularly liked the choice of shape which was no doubt liken to Phil's own love of Prometheus. Still, this has given me a few ideas for a couple of things I may be testing over summer :P
The Jiggle weight deformer was a love hate relationship, I loved the painting side it was very organic and felt completely natural. However a slight alteration here or there could mean something jiggles too much or too little. Don't get me wrong I appreciate what it does but whatever result I got it felt un-natural... I could be mistaken...
The heart was completely enjoyable, especially once more realistic movement was incorporated. The jiggle weight was just a case of finding the right balance once again but the heart moving side to side from base joints evened the odds. Using a box to deform the shape of the heart was another great way in which one can expand and retract geometry...
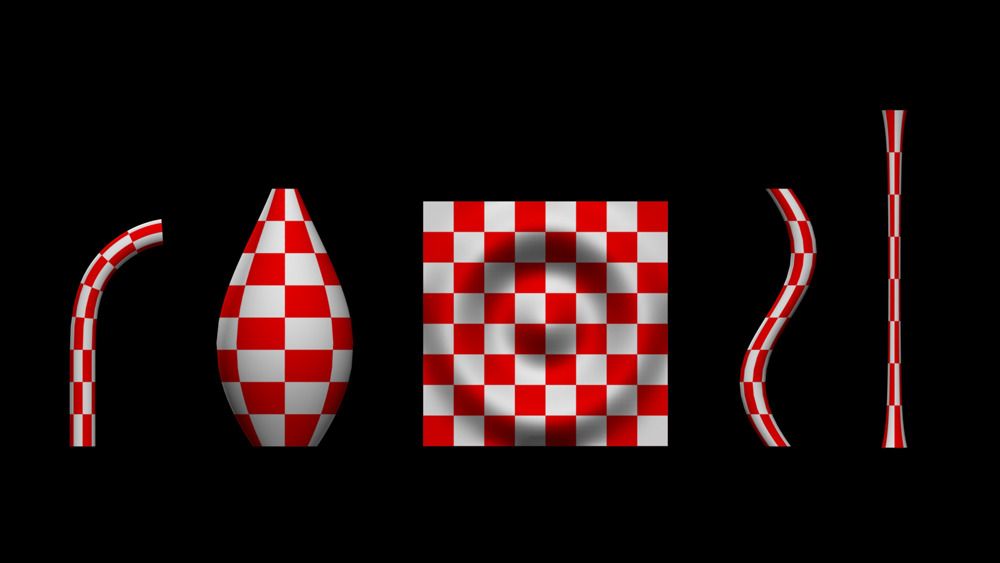
Shape control was next, I am a little gutted that I only got to create an image with this one, suffice to say learning about the different deformers was quite possibly the most fun I have had with one of these tutorials. Each deformer created a different effect to a shape I keep kicking myself for not doing this one sooner, some of the tricks these things do took me ages to work out for my short..
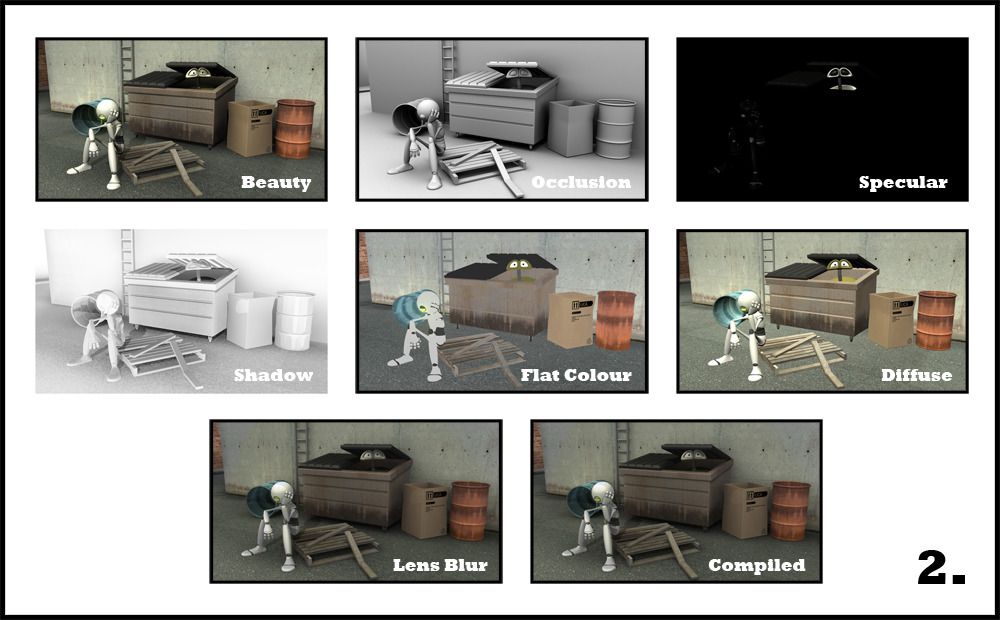
Basic software passes were quite possibly one of the least interesting, I understand the reason for them being there and being able to edit individual aspects of an image is an excellent thing to be able to do but there were so many ways in which these methods were demonstrated I ended up with lots of duplicates to the point where I couldn't tell what was what hence why I have 2 beauty passes in here (somehow).
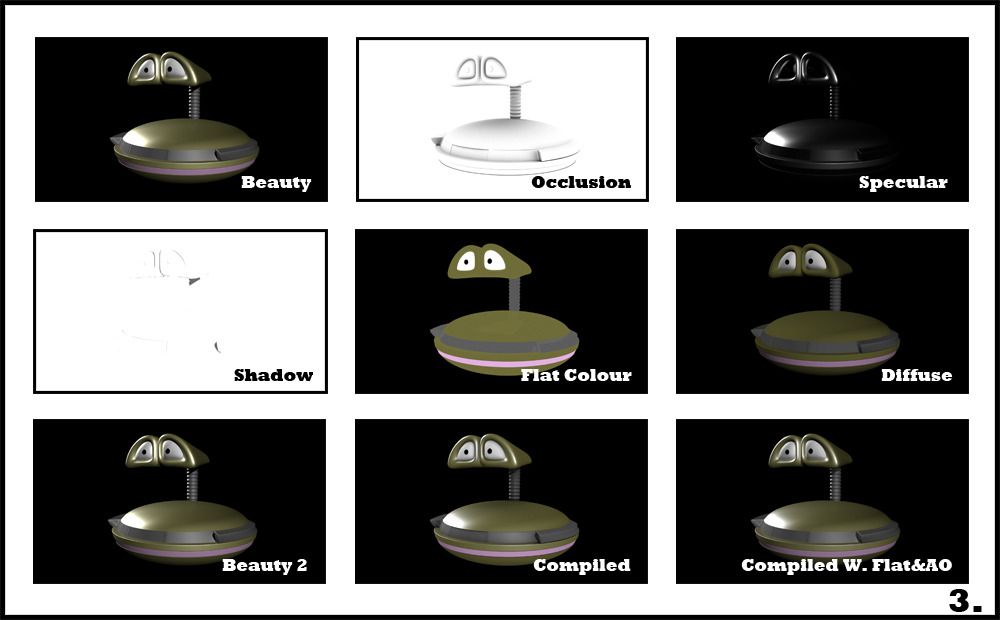
Things started coming together for this image, much more neat and tidy but the pass methods were kept to a minimum if I recall the tutorial. We were given the option of playing with the lens blur effects in After Effects something I decided to take up just to see what kind of momentum I could acquire, tbh I couldn't tell a massive difference but I'm sure there are people who can...
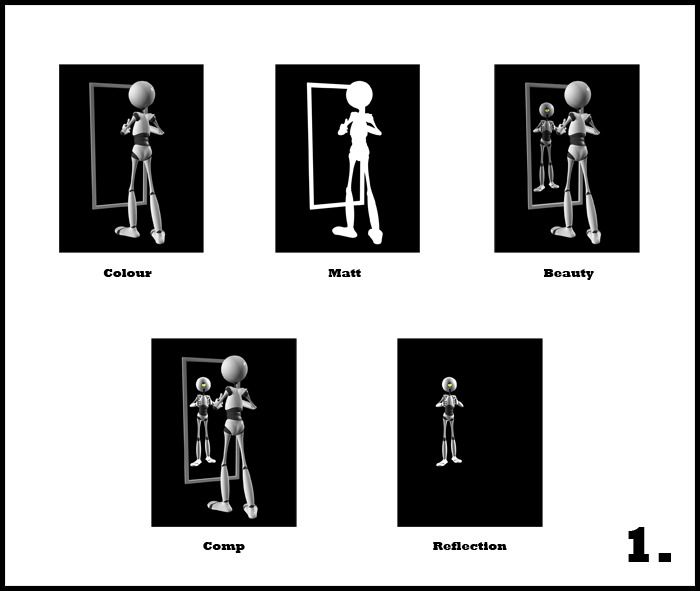
Having not being able to find the effects pass video I moved on to the reflection pass which was quite interesting to see. The reflection of the mirror giving off a different feel entirely. The importance of these separate passes really showed different identities here allowing me to understand better then the prior render passes. Still, their worth is not without question...
The beginning of the sculpt deformers was my nightmare and TBH I still have yet to crack it, I could get the arm to do what I wanted it to but the Jiggle effect combined was not working properly, the jiggle kept protruding from the mesh and not deforming the arm at all. I will look at this later as I am fascinated as to why it wasn't working for me... Ill let you know if I actually figure it out...
I was happy to find that this was my last video in the entire set, the deforming of the belly was a nice refresher for what I learnt with the arm muscle (minus the frustration of a jiggle). It was nice to see it for what it was and to actually sit down and get to grips a little more with the set key functionality in Maya. I will be looking into this over summer to a much greater degree... well that and UV Mapping...
Well that concludes this post of 3D modelling, again I would like to apologise that it's not all here I had a trip away arranged for this week but at least I got one entire section done. Regardless of the grade I will probably do all of these videos anyway just so I am well versed, I have a rig that I have to build in the next few weeks anyway of our little caveman so If I think of it I will post a few little nuggets on here for all to see...
It will be interesting to examine another form of skinning which I know is what the other section was about. It will be interesting to do I have a number of things to post after this including the completion post of Unit 6. Ive just been too knackered to do it but now I'm back and a little refreshed it wont hurt I guess...
Anyway hope everyone is having a lovely summer!
Over & Out,
xXStItChXx