Thursday 26 April 2012

Unit 6: Commission - Texture Creation/Influence Map

Hello Everyone,

A small update in the grand scheme of things but never the less here it is. I created these textures the other day and I wasn't sure whether or not it was something that was valid to be posted on the blog, in the end I thought what the hell. I even compiled the influence map for the style in which I will be using for this unit. I have yet to put in the research but that will probably be something that I do at another junction, before the next step.

I am somewhat prepared for the next step of the process which will have me working on detailed sketches that will eventually fade into and become 3D models on this worn digital paper of mine. I have kept the book in mind but the way in which the images go from sketches to 3D models may involve the use of zooms into boxes.

Anyway lets get down to the work at hand...


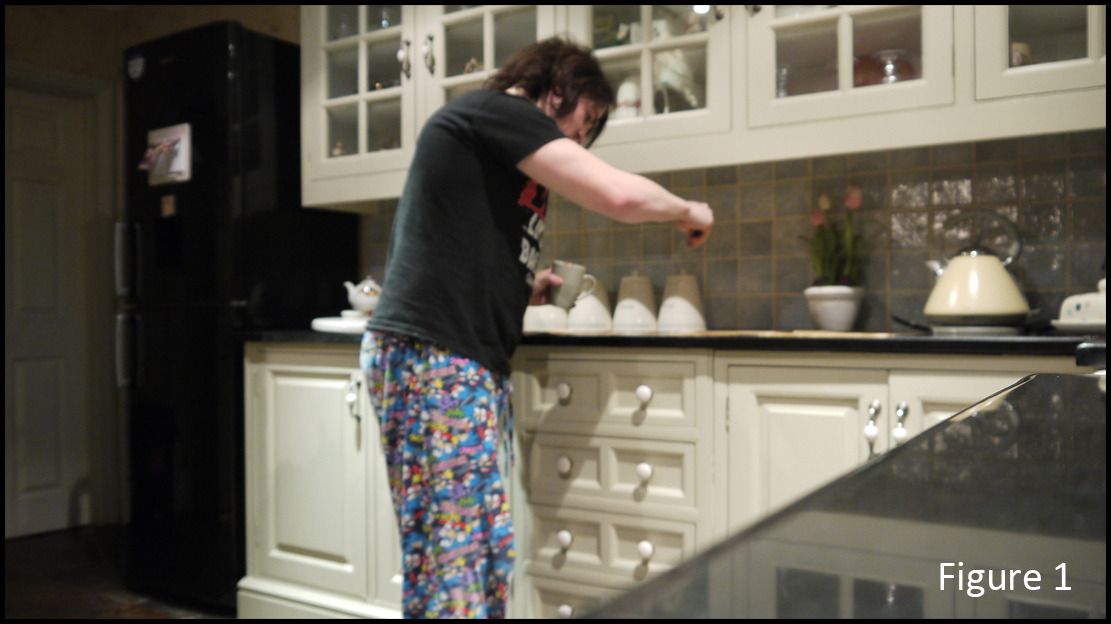
Figure 1 shows me in my pyjamas (please don't mock them they are sonic the hedgehog!). What is important here is what I was doing, hand dripping a combination of tea and coffee onto sheets of A4 paper. I never created a texture this way before but I wanted to this time just to experience the worn paper effect first hand.


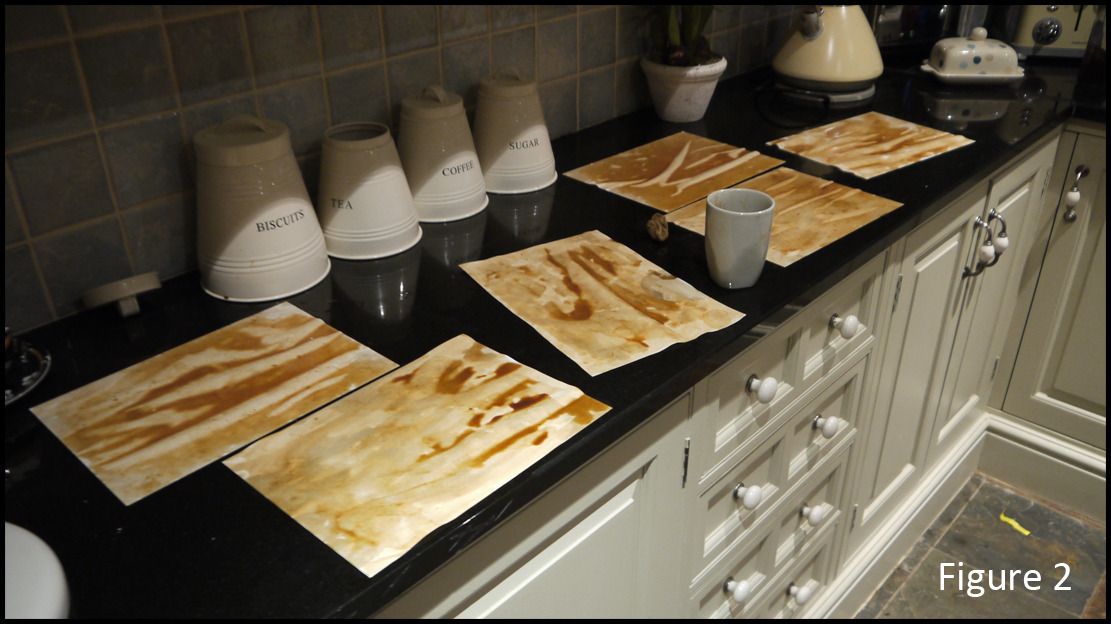
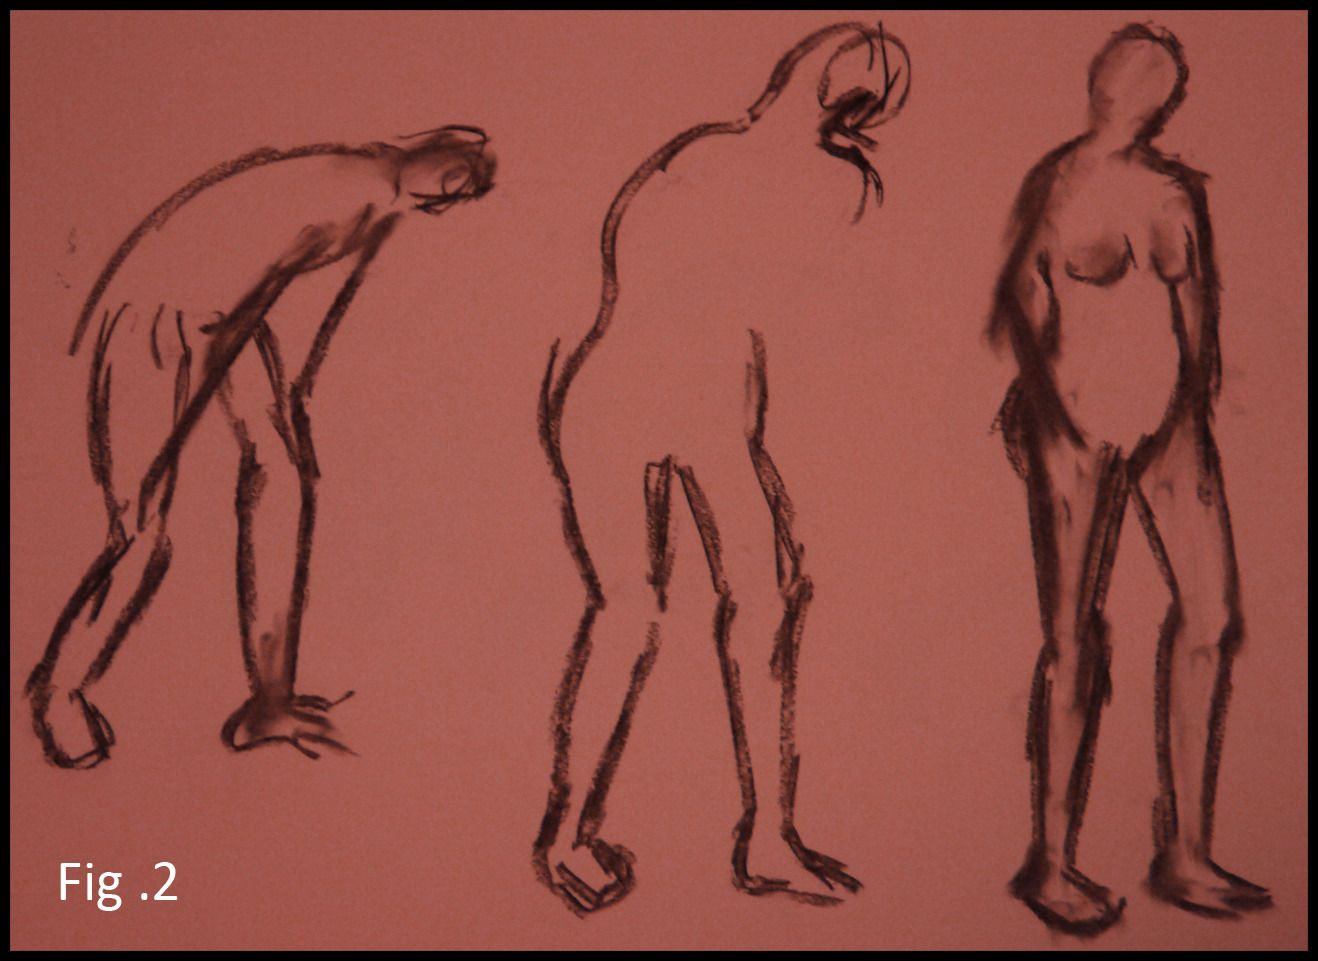
Figure 2 is the aftermath (believe me it was a mess) to top it off I stank like coffee a smell which isn't entirely out of my skin paws. I found the process really cool to finally get stuck into, I have spent waaaaaaaay too long using other peoples worn paper textures it was nice to finally sit down and make my own.


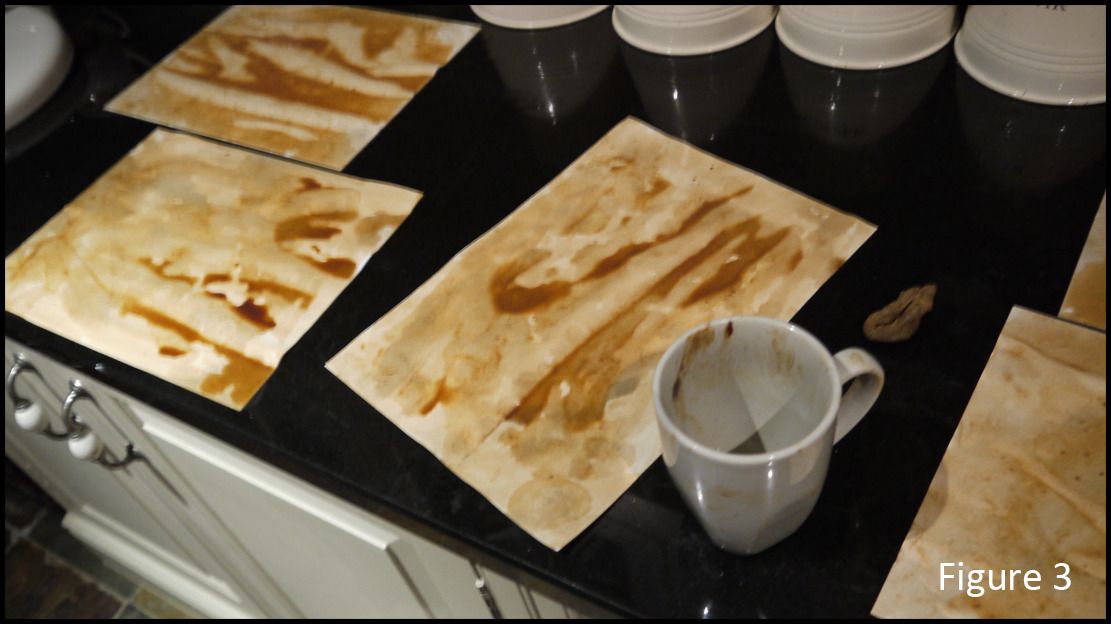
Figure 3 is a close up of the mess, not sure why I thought I'd put this one on there probably just to survey the carnage a little closer. The process that followed this was my first real experience with an iron (yes I've never ironed clothes before) nearly burnt my hand with it. Still I got the hang in the end and it finished the process.


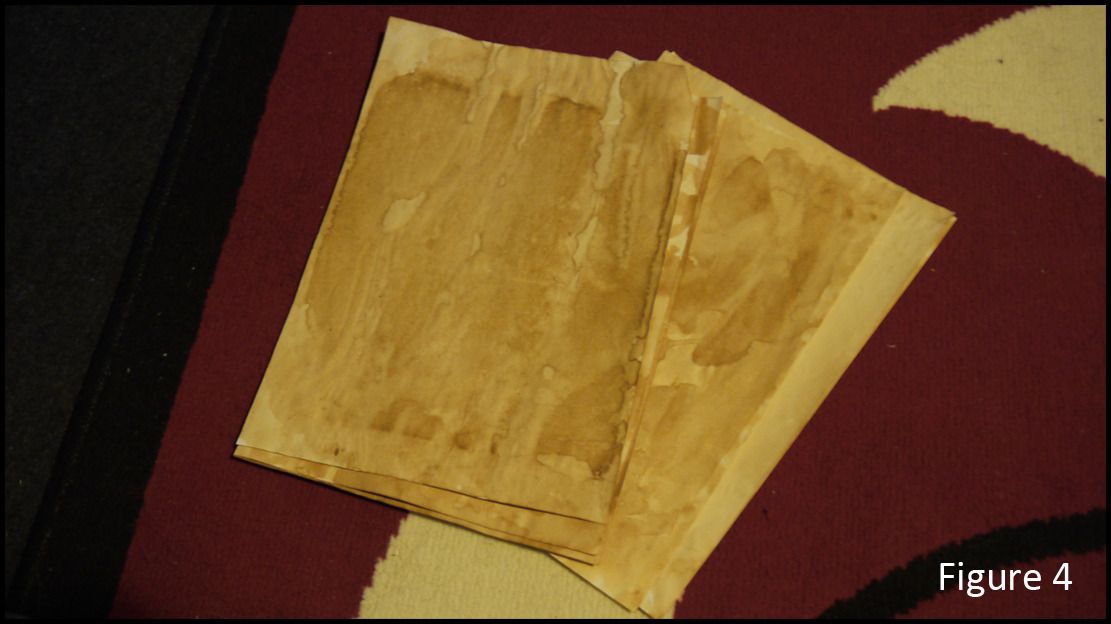
Figure 4 is the paper I created after the ironing process of course I tried a few methods before this which included using the hob in my kitchen. Suffice to say the iron made the process go quicker, I just got sick of waiting around in the end I just took a leap. I think the paper turned out pretty well I must say, well it could have been worse.


Figure 5 was my first book test, prior to Phil's feedback. The book with the pages turning may be cliche but I don't know I kind of like it. Still there are other avenues to consider I guess I will just explore them all until I find something that truly jumps out at me. I could find something 100 times better which is much easier to produce.


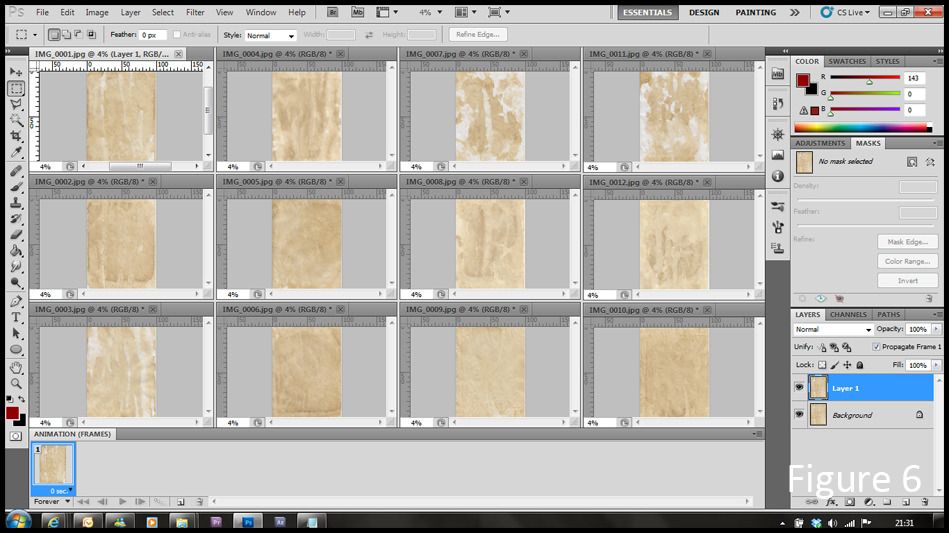
Figure 6 was once I had scanned all of the sheets in (both sides) as the images were different on opposing sides. I decided to get them all in photoshop and take a glance I think you will agree they look no different then most destroyed texture paper over the web, the only difference is you are seeing the process right here! :)


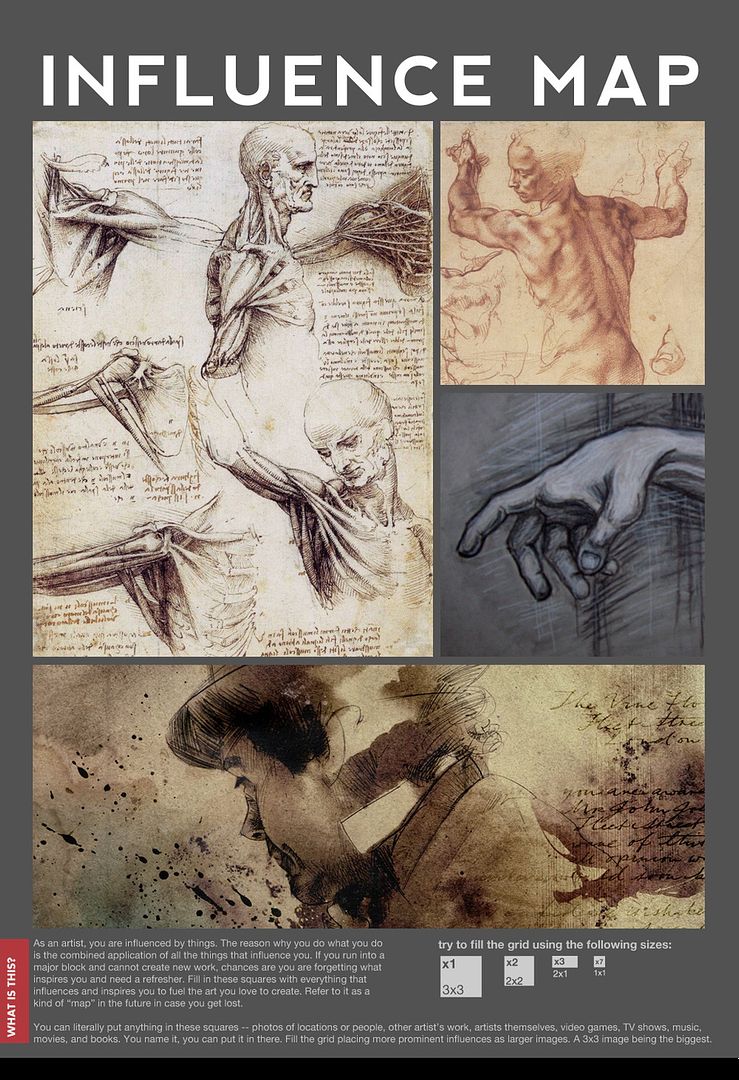
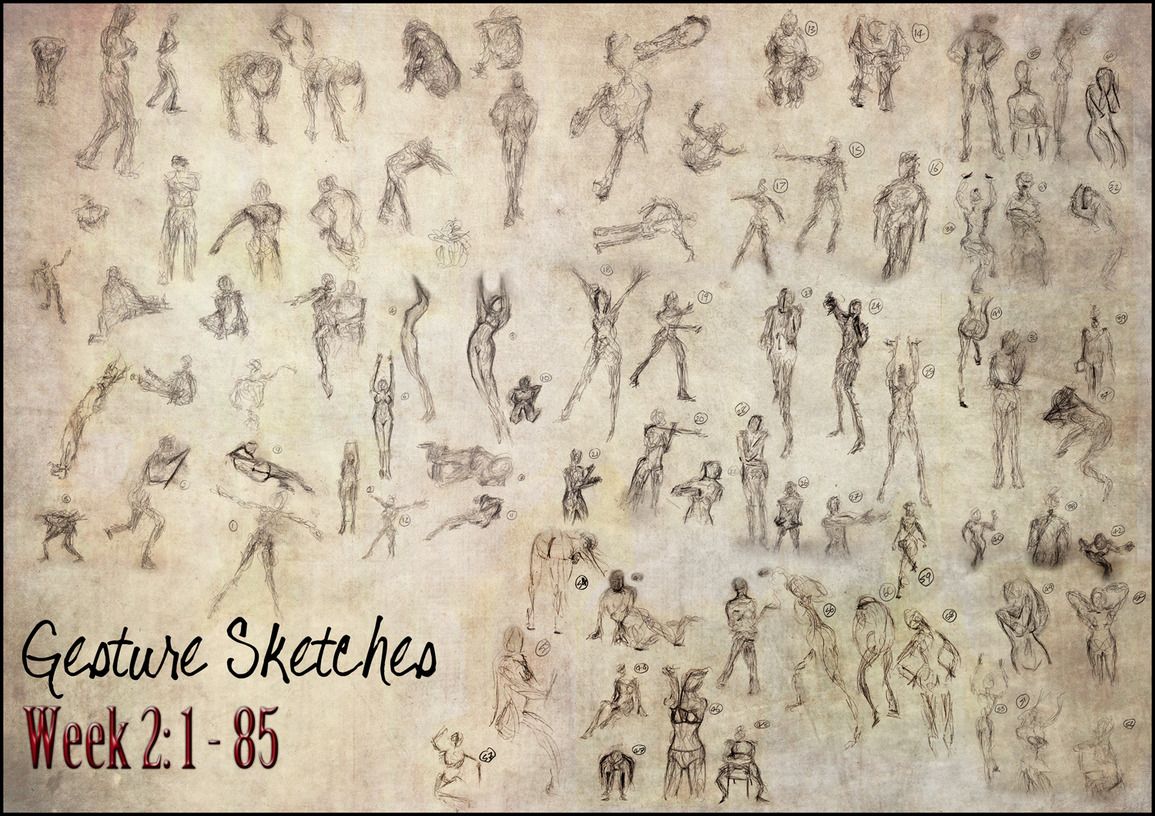
Last but not least is my influence map, I thought I would roll this into the post after all it saves me making a dedicated post for one image. I have made Davinci's journals my focus but I have also considered other sketching styles including Michelangelo. The Sherlock Holmes credits also are a great influence here, the style was so awesome and crossed from footage into artwork seamlessly - Something to consider.

Well this concludes this little post, I should probably get ready to depart and get some much needed work done at University.

Hope everyone else is having fun!!

Over & Out,
xXStItChXx

Unit 6: Commission - Subject Matter/Research

Immortality Subject Matter

Tuesday 24 April 2012

Unit 6: Commission - Artistic Style/Journal

Hello Everyone,

Ive been doing a bit of digging trying to unpack the idea of an animated book with text. I even found a video from Castlevania: Lords Of Shadow, please see the video below:


The first few moments of the video (involving the book) are how I plan to animate this project. Possibly a diagram of a drawn image in the book which moves ever so briefly only to become a 3D object when it is zoomed into. The words draw themselves across the page and are read by some kind of a narrator. In the case of ageing the shortening of telomeres on a DNA strand.


My art style is very much based on the journals of Da Vinci. I have provided a few which are directly from his journal (like the one above) more then anything I love the worn paper effect as it will be so nice to throw words across.


This theme of course feels more adult then for children but that being said I don't want to write the fantasy element off. If its done right I could attribute it to teens which is where it feels it would benefit the most. Still I find the concept very interesting and it could be the way to go...


This has numerous clear advantages to it also enabling me to make do with colour and use sketches. I will obviously hand make my textures for the pages of the book - a first time experience for me and I cant wait. I will be researching my demographic, etc Next just to see that I keep to the conventions of these brief and my project for this Unit.


I see the book being a 3D model on a desk in some kind of Victorian scene, there could be brief animation in 2D sketches on the page (when I say brief I mean brief). The camera could then zoom into the sketch and it could become the 3D model and act out the explanation of the process of telomeres degrading.


I feel enthused about this direction, I'm gonna have to figure out quite a few things but I believe this can be done if I keep it simple. I'm not going to over complicate anything on this brief. I have a maximum of 2 minutes, If my film sees 1 minute I'm going to be happy...

The last Units have taught me I cannot burn over everything this has to be handled to my own limits here. I don't think this will be complicated in any way shape or fashion, I think it will be just right... and I get to have a small play with some of my remaining animation paper which thanks to my sketchy idea will work wonders on old worn paper...

Well this concludes the art style that I am thinking about using, please drop me your opinions if and when you can in the mean time I'm going to be talking about this to a few people I know in the science game so to speak.

Take it easy!!

Over & Out,
xXStItChXx

Unit 6: Commission - Initial Thoughts

Hello Everyone,

I've been contemplating my chosen idea still thinking inattentively but the theme for how we perceive age appears to be very cutely linked to fantasy. The title of Peter Klappers presentation speaks about "Becoming Immortal" which would in no small part make all of mankind gods.

If I'm going down the Fantasy Route I'd like the option of considering an animated story book but no not like how past projects have been done, what I'm considering is something new. From conversations with Nat I'd really like to do something that inspires me and this method of storytelling has inspired me since I saw it in a game I once played - "Lost Odyssey".


A thousand years of dreams is a method of story telling in which text is sprayed across the screen in various animation methods. Sound effects react with the text and the backgrounds revolve and subtly move with dream like borders. The artwork is painted but I can see the method working for moving 3D models if need be. I just wish this idea to be told like a story as a fantasy writer would.


With that being said I could converge this tale into actually being a dream but a dream based on scientific fact. To those that don't know of Lost Odyssey it is about a man that is immortal - flashing back through dreams of his past, which he gradually remembers as time goes on. I just want to go on note by saying I love this method of story telling.


The images don't do it too much justice but I believe it to be a very effect way of telling a story. I had beginning to tailor make my own prior to coming onto this course and I've been looking for an opportunity to use it myself. If I could use this or at least a form of this I would be very happy.


I have found my two favourite "Dream" sequences from "Lost Odyssey" videos that got me thinking about the importance of Narrative prior to even considering going to college. If it wasn't for these I probably wouldn't be here right now. Theres nothing I'd love more then to get a chance to create something inspired by these.


The Art Style is very painterly but I think it could work if done effectively with 3D Geometry, I just have to find a way of making the experience engaging. Perhaps this can be done with the fantasy theme itself I just have to consider an interesting narrative and a way of broadcasting that to a demographic.

The post production will be the vital component of this medium but I believe it can be done in 1-2 minutes, the art of Klappers presentation in particular had a very fantasy feel about it. I think this is an effective way to go, of course I will look into the demographic this will be aimed at.

I just hope this method is okay, it would really boost my inspiration levels. Anyway I have two other posts to make today which are based around this research specifically. Lets hope all goes well...

Take it easy!

Over & Out,
xXStItChXx

Unit 6: Commission - Time Management

Hello Everyone,

Just thought I would get this up, after all day one of every single unit usually consists of me managing my time to the best of my ability. I have to be really cagey here because alot is expected for the OGR. The Pre-production will be the first 2 or so weeks production the second 2 and post for the final week.

I think that is a good way to think of this project today I will be posting some market research with some initial ideas just to get my thoughts out there. I got a big break on the Saturday as I have an all night event which is why there is a random red cross in the middle of everything. I just have to keep to this schedule, there can be no more delays.

Avert your eyes to the Unit 6 task board...


I will be considering a much more concise break down for this moment these things don't need fancy titles I just need to know what they are and what each week needs to signify.

Week 1 - Pre Production (Initial Ideas/Drafts/Sketches/Marketing)
Week 2 - Pre Production (Final Scripts/Storyboards/Animatic/Pre-Viz/Concept Art)
Week 3 - Production (Final Concept/Design Doc/Pitch/3D Modelling/UV Layout)
Week 4 - Production (UV Texturing/CG Pipeline/3D Lighting/3D Animation)
Week 5 - Post Production (AE Titles, Effects, Transitions & Sound/Art Of/Presentation)


I guess this is one more large push until everything cools off and I get to relax my brain for a little while. I'm toying with the idea of going with Ageing for this unit, it will be nice to know why I'm becoming an old bastard. I have a couple of ideas but they are for a little later in another post at some point today once I find out a good delivery method.

Wish me luck I think I'm really gonna need it here...

Over & Out,
xXStItChXx

Monday 23 April 2012

Unit 5: Animation - Time Management - Deadline Complete

Hello Everyone,

Just wrapping up this Unit before I get invested in the final Unit of this year (Unit 6). I'm not without doubt there seems to be a lot to be done on this brief but I'm taking comfort in knowing that we are required to do hardly any written work and no life classes meaning I have more free time. I just have to focus gotta keep looking out for that next massive chunk of rest.

This unit has been to say the least one of the most difficult and time consuming things that I have ever done. I'm tired but It has opened my eyes a little. Animation was something I wasn't even able to comprehend before and it took a lot of soul searching to actually understand it. At least now I know how to do it for any 2D games I go to make in the future (something hush hush that I will be working on over summer).

Anyway lets sign off Unit 5...


This is the task board with crosses all over, I'm pretty sure everyone has seen my process 9 or so more times by now so I'm quite sure that you are used to it. Needless to say the next Unit will probably have to be more strategic, I have a few ideas.


This is me with the board I usually do this one just to show that its all mine that's if the wallpaper didn't give it away. Tomorrow I will begin serious research into demographics etc, this is the best way to start this project so I will follow it to the letter. Tonight as always is about planning out the workload and finalising the old work load.

Its kind of weird really, a year has gone already not that it hasn't been tiring. Not sure what to expect next really, but I won't get rusty over summer If anything I have to refine I want this stuff to become second nature and if I keep going with it even if I bodge Unit 6 it won't happen again.

Well, it was an interesting experience Unit 5, part of me will miss what you have made possible in my mind. Part of me also thinks yikes how did I actually manage to do that. Hey Ho...

5 Down 1 to Go...

Over & Out,
xXStItChXx

Sunday 15 April 2012

Unit 5: Animation - DVD Case, Display & CD Design

Hello Everyone,

Been working my butt off on animation, had no idea it would be this hectic and yet I'm only 14 seconds into it. Never the less I thought I would get the little bits out of the way quick so I can get back to it full force. I do love my branding, something which I may be porting across to my Art of Publication which I will probably get out of the way today while I'm thinking of it...

It's been a tough few weeks, I was going to get to work on some Unit 6 work this week but I had no idea how lengthily this process would be. I'm also a little worried as my paper supply is slowly becoming lower just hope I have enough if not I'm gonna have to do this additional line animation in photoshop with no paper...

Anyway lets get down to the Case Design...


The image above is my CD design artwork, I'm gonna print all of this off now just to get it out of the way. I'm always doing this part last minute and personally I think its too big of a risk to be taking on the last few hours before a crit. Some people call me crazy for taking it to these extremes but I love my presentation...


The image above shows my Case Design I'm liking the chalk feel of it mainly because I am playing with a specific style for my 2d animation. I'm not sure if anyone can notice but I used the texture of my animation paper to make the case cover, I just changed the colours somewhat - I love it.
Last but not least is my case design display I do this for everything it began with my games case designs for our own personal projects. It just helps for me to see what the cover looks like in a display panel. It looks impressive, and this one is probably my most favourite to date...

Well this concludes this little update, I'm hoping I have better luck with my animating this week. I still have essays to consider but at least the time machine has been put back giving me a little more time on that. I'm just lining up my priorities here.

I hope you enjoy this post, again I can only apologise for the delay of these updates. I will not make excuses for myself only to say that I will work my butt off till I have met my goal.

Take it easy all!

Over & Out,
xXStItChXx

Sunday 8 April 2012

Unit 5: Animation - Maya Exercises, Week 4 - Additional Rigging

Hello Everyone,

Just posting up the final Maya lesson (which I also missed - sadly). I have enjoyed these rigging exercises I must say specifically when I got to size my rig to a character mesh - It just felt great to be attributing the skeleton to my little caveman. I was a little gutted that we didn't get to skin weighting but I guess that comes soon...

The final weeks exercises consisted of additional rigs, which were basic eyes, tail & object exchange. They are all valuable things to know its just a shame we didn't get to work on that little skeleton more :P

Anyway lets get down to the videos created in Week 4:


The basic eye rig (shown above) was quite possibly the most confusing, setting up the blink motion required lots of work with attributes and connections etc. I still find this a confusing part of the process but I don't doubt that's just a trial and error experience. Eventually we will become comfortable using them, 10 rigs down the line...


The Object exchange rig (shown above) threw a few tiny problems my way particularly with the wording on the tutorial document itself. Still, once I got over the floating object situation realising it wasn't something I had done I managed to get the hang of it. I even decided to provide the returning motion just for kicks...


The Tail & Spline rig (shown above) was my favourite of this little trio. Throughout I was just constantly wondering what will this do to make it read as a tail to me. Once I began having a play with the motion after the tiresome scripting stuff it made me chuckle. I thought the whole thing was cleaver after - its awesome!

Well this concludes the final week of rigging, again I'm a little sad to see it pass but I don't doubt we will be returning here again soon. I may even look deeper into this over summer when I am juggling my company work in Unity.

I think there is only one post to go now until I finally get down to the animation project, I'm a little nervous but I guess I can only do my best here, just gotta enjoy the burn...

Take it easy all!

Over & Out,
xXStItChXx

Saturday 7 April 2012

Unit 5: Animation - Life Class Week 15

Hello Everyone,

Last update of the day before bed, this is the stuff from our last life class session. I would just like to mention that I have not included everything drawn in the lesson as we were asked to knock up lots of smaller images which I chose to throw across in large images. Needless to say the only images that I felt were worth posting have been included in this post.

Week 15's life class was looking at moving form once again, still not my preferred method of drawing. The images were to remain loose just to somehow convey a floating gesture from image to image.

Lets get to the life class images:


Figure 1 (shown above) is a standing pose, I preferred seeing images in this way. The problem I felt with the moving image is after a while the images begin to merge into a mess and its difficult to isolate which line is which. Before you know it you are ruining forms which made more sense earlier on.


Figure 2 (shown above) is the continuation of the standing form in figure 1. The page changing between figure 1 to 2 delayed the completion of this page, I had underestimated how used to drawing massive I had become. My perception of visual form resolution has changed so being asked to draw smaller suddenly was a little bit of a shock on my eye.


Figure 3 (shown above) consisted of the model sweeping the floor something we have seen alot of this past few weeks. These were all required to happen very fast, I found adapting to this style of drawing difficult, I like having the freedom to refine. In this case you blink and the pose the model was in is gone, you can only move on, it was challenging to say the least...


Figure 4 (shown above) utilised a fabric of sorts which made the drawing easier as it covered a third of the form half of the time. My eyes were also adapting to the idea of a smaller image. I was glad by this point because I was tired of constantly having to change massive A1 paper for 2-3 charcoal rough sketches...


Figure 5 (shown above) consisted of our model picking up and object and then throwing something from it. This turned out better then I thought it would, again I was proud that my eyes actually adapted to the size alteration. The second drawing from the top left was quite possibly my most favourite here, the form was good for such a quick sketch...


Figure 6 (shown above) was the first of many moving images we were to construct. Some people found this process easy, I didn't, I understand the importance of a flowing image but I just couldn't get comfortable for the short period of time in which we were to draw. As mentioned in other post I like being able to make refinements, form has to at least feel right to me, this process I felt didn't allow for that.


Figure 7 (shown above) was when I felt things were beginning to get really messy. As I mentioned earlier eventually too many drawings just becomes a mess and its hard to define what is what. Possibly different coloured pencils could have aided here, its what some people were doing, I wish I had considered this process, the constant array of blacks was just hard to read and identify one image from another...


Figure 8 (shown above) was actually 2 different poses but having used so much paper I thought I would try to throw them onto a single page. At this point things were just constantly moving with no serious pausing, I found this difficult to isolate & refine. Probably what I wasn't enjoying was the inability to fixate on a pose, I think this is just a lack of experience on my part. I will be looking into improving this field in the near future...

Well that concludes week 15 of life class. It wasn't perfect but being able to identify my flaws is good, I know what I don't understand it could just be I cannot break down the information in seconds, it could be my want to be perfect... Either way I learnt a hell of a lot...about myself.

Take it easy people!!

Over & Out,
xXStItChXx

Unit 5: Animation - Walk Cycle Sheets

Hello Everyone,

Another small update before the big push tomorrow and beyond. Not sure if you have noticed but I spent a portion of today updating the blog layout as it was felt the theme I had was a bit too specific regarding the topic of genre. It was for this I decided to revert to my name and some chosen sentiments that I have to tell myself every day.

Anyway this post is about my lamps walk cycle, I had this done a few days back but due to other things as I have stated before it was put by the way side never the less it is here now...

Well lets get to it, I have another post to make after this...


The Squash Stretch tests (shown above) were my basic introduction into beginning to animate my lamp. I wanted to break my lamp down into components, and then consider how those components could move. This was before consulting the survival kit so there are some obvious miscalculations.


The foot squash test (shown above) was my very first in depth look into the theory behind animation. Everything began falling into place here, I knew how this lamp could move & I wanted to really convey him as a brute, the foot was only the first piece of the puzzle. This cycle will help me when I come to finally embrace this unit.
The cluster image (shown above) is what I drew out first ironically. I wanted to understand how the body reacted to its own weight and how that impacted the spine and leg. The neck was also considered especially when it was coming down from the hop, the toe approaching before the rest of the body.


The Walk cycle sheet (shown above) illustrates my oafish lamps walk broken down from the cluster. This was done after and actually made sense to me. I was also proud at how it was able to convey the motion I wanted in only 8 frames but I guess that's what successful animation is, the more accurate the less frames are required...


The Draft cycle (shown above) is what happened when I put the 8 frames together and moved them forwards. Needless to say I am quite proud at how this little guy moves. To think I was completely unconfident when drawing it in my sketch book (no animation paper was used).


The Inked cycle (shown above) was the same as the above only I decided to throw a splash of photoshop line art over the top. I probably wont reach this phase with the final animation but it was a nice thing to know was possible once I had the movement finalised. This made me think how easy it would be do ink almost anything once it is made...


The Inked cycle with sound (shown above) was my final test, I had to see how sound would work with the movement of the object. Like Disney with steamboat willie, I wanted to feel the character & I placed in a drop of my chosen track to feel the pace which worked well considerably. Pace is part of everything when considering any form of animated video.

Well that concludes my look into the walk cycle of my character, It is perfectly defined and I don't doubt I will get the chance to improve the rate of frames with the final animation push for this week.

I have another life class post to make before bed but I have learnt alot this Unit. I may not be the best but at least I understand the method, I just gotta try not to over complicate things... I tend to a lot.

Take it easy all!

Over & Out,
xXStItChXx

Friday 6 April 2012

Unit 5: Animation - Week 3 - 2D Animation

Hello Everyone,

Just bringing in another update, the week 3 animation class (which I wasn't present for) I was told of the homework by Jojo (thanks Joe you rule). This was to establish our setting and the 3 key scenes of our narrative, the scenes I roughed out - at this point I wasn't sure where to go. Once I got cracking on establishing the setting the story began to unfold.

If you notice my storyboards are much tighter this time round also, I really managed to embrace the story after establishing my setting, it was like the missing piece of the puzzle. I can quite frankly say my storyboarding skill has most certainly improved...

Anyway lets get onto the animation homework...


The image above shows my establishing shots for the "empathy lamp shop". I really felt proud of these images, prior to this I had no idea where to take the story, I was constantly myth ed and wondered if the story I had penned could even work. These images helped me isolate what was key, what made the store work.


The image above shows my 3 primary scenes of the animations narrative. This aided in understanding my story, I didn't want to be precious with time on this image, I just thought what I wanted and threw it onto the page without too much thought (in the space of 10 minutes). It made me understand what was important, what was key: "A lamp awakes - and trips over, its humiliated so it takes its aggression out on its plug and rips it from the wall causing a fire".

Well this should conclude week 3 of our animation classes, again I am kind of gutted I wasn't there. My stomach always picks the best times to mess me about (which is alot nowadays sadly). Still, at least I did the tasks required and they actually helped me here so they were more then appreciated.

I guess this concludes this little post, again hope all are having a good Easter, I might go to bed in a minute :P

Take it easy!!

Over & Out,
xXStItChXx

Unit 5: Animation - Final Storyboard & Animatic

Hello Everyone,

Once again apologies for the delay but I have been doing quite a few things, never the less I am here with one of many new updates. This week is the epic Animation grind but I am pleased to say that I am ready for it. I have a lot of things done just not alot posted so many will follow this one I am sure.

I spent most of today fixing up my animatic which included finding sound and the perfect somber tune to fit my little epic. I am quite pleased with this Animatic, its actually more lively then the long shot animatic. I was able to be more creative with fewer panels which convey what I am hoping to animate perfectly.

Anyway lets get on to the post.


I broke my story down in 15 panels, leaving room for me to indulge in a little creativity on those impending seconds. I have planned everything down to the frame and fall perfectly with the 1 minute time constraint. The only thing the storyboards lack is the screen direction but I pretty much knew this & convey it well in the animation of the camera positioning & scale.


The animatic (above) shows my thinking toward this project, the lamp itself had to be somewhat shortened so I could fit it into a 16:9 aspect ratio, never the less it is quite obvious that my lamp is a standard lamp and not a desk lamp as was original designs. My "Slouching Lamp" is hunched and oafish, uncouth & clumsy, I didn't want to convey anything else... it just became its own after that...

Well this is the first of many but with the Animatic down I know how my story will go and exactly what needs to move and how. The rest is for everyone else to enjoy on Crit day, I just gotta pull my socks up now and get running before this project escapes me.

Hope everyone is having a good Easter btw, even though I myself have been sweating on my business stuff I have had a little time for some R&R. Never the less now back to the grind stone.

Hope everyone is good!

Over & Out,
xXStItChXx

Wednesday 4 April 2012

Unit 5: Animation - Week 2 - 2D Animation

Hello Everyone,

Sorry I have been MIA, its been a hectic few weeks just thought I would post my animation stuff up for week 2. Hadn't had the chance until now, got many things moving in the background. Never the less I have been working on other things they are just not ready to be posted as of yet.

For week 2 we were required to do gesture drawings another 60 or so (10 in class and then 50 during the week). We were also required to create some animations which I found kinda tough because I am trying to conserve paper. Week 4's stuff will probably have to wait till I have completed the final animation to make sure I don't run out...

Anyway lets get down to the required...


The image above shows my 85 gesture drawings which were done throughout the course of week 2. Some were better completed then others but I thought the real idea of the exercise was to establish form in a quick and rapid pace. Hence why i kept all images to a 1 minute drawing spree...


The video above is my sitting/standing animation which Meg had us draw as she stood from a chair. I managed to get some basic lines down but for the most part it was a difficult thing to isolate sheer moments. Still it's a learning curve but I managed to construct something not unfamiliar to megs stand.


The next video (shown above) is my ordinary walk cycle. I thought this went pretty well considering that I did it in the space of an hour. This gave me more confidence in my animating ability, from here I was pretty much ready to confront our final piece of homework which was the demeanour of our character...


For this video (shown above) problems came a little more thick and fast. I had the walk down all slumped looking very oafish, but the trip I elongated and therefore made more complicated. After some surgery the video flowed and really conveyed the impact of my drawn character impacting the ground and becoming dazed...

Well that concludes week 2 of our 2D animation class, I was quite gutted that I missed the other 2 weeks. I will make up for it with the homework - week 3 has already been finished. Still it would have been nice to see what other techniques Meg had to offer... hey ho...

I'm hoping my lamp walk cycle will follow this post, we will have to see I need to use the scanner and my mates zbrushing...

Over & Out,
xXStItChXx