
Friday, 25 May 2012
Wednesday, 23 May 2012
Unit 6: Commission - DVD Case, Display & CD Design
Hello Everyone!
Another small update but there will be no time tomorrow as everything will be printed I am just going to be adding effects and sound all day. I will finish my Art of booklet tonight as well which I will have to delay until after I have my 12 render passes.
I decided to simplify this design because the person who commissioned me would not want to see everything on display all over the case, simple is sometimes more professional. The disc is what the disc is and the case is just what the commission is. To truly evolve I have to consider what the client would want not what I think looks pretty cool...
Right lets get down to the case design, enjoy people!

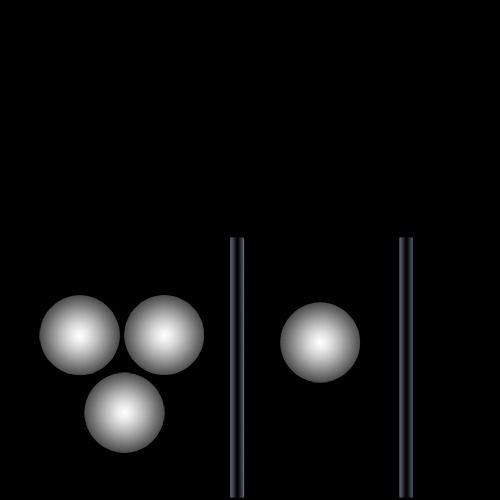
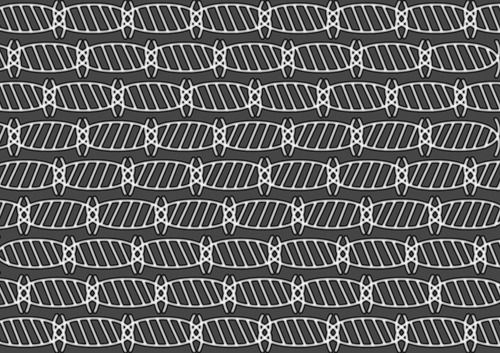
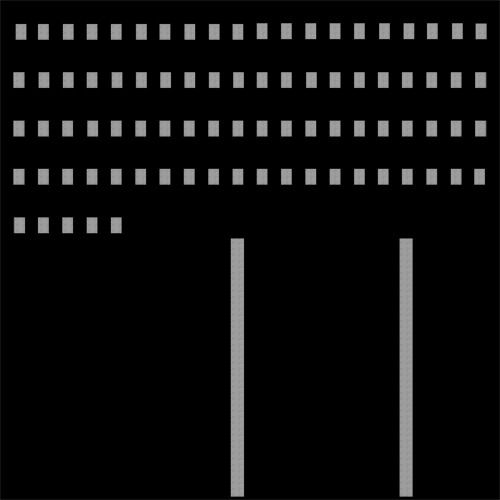
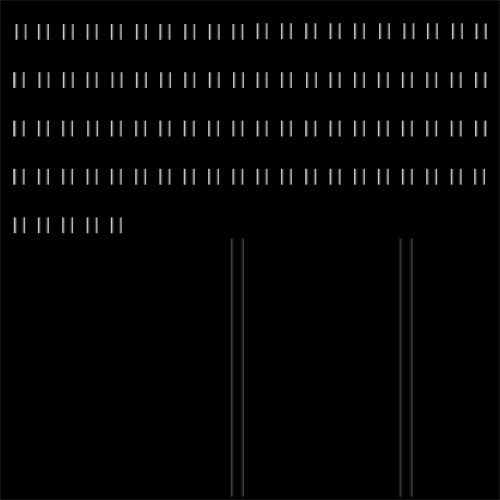
The image above shows my CD artwork as I said I decided to keep it very simple this time, people don't need to see my ugly mug and if they are clients they want to see what they commissioned me to do not all of the little snaggles within. Besides it keeps the whole thing interesting, kind of like "oooh ahhh whats inside?" Still, I have put my personal touch on it :)

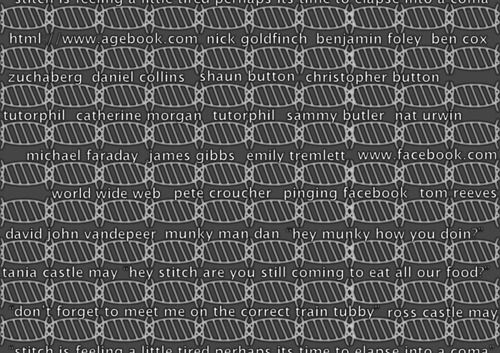
Next came my Case Design, again very simple with one little snippet from my final animation. It actually freed up most of the back allowing me to fit in the entire creative project brief which has been a nightmare to fit in in the past. I decided to keep everything in keeping with the facebook theme I.E. the subtle blue and white I have to say its so simple that I love it.
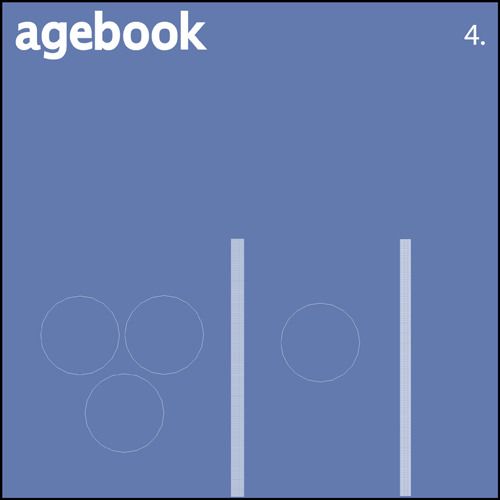
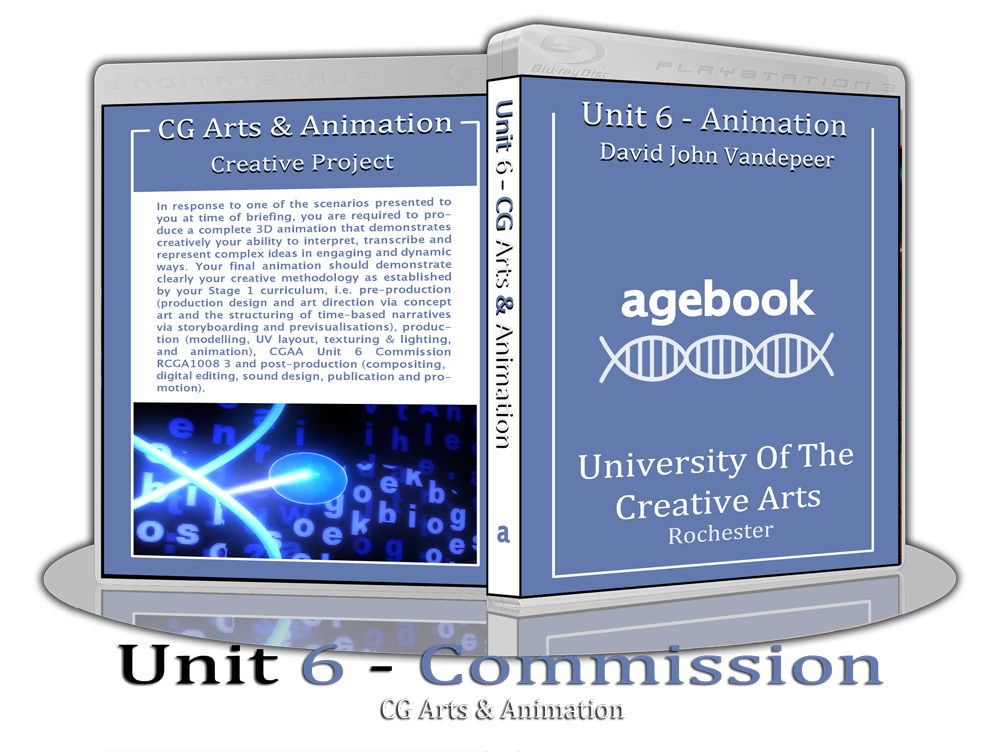 Last but not least is my Case Display which is theoretically irrelevant but I do this because I think it looks nice and it only takes a few seconds to sort out really. I think this design is a good end to the year and a good way of saying goodnight as it were because I'm going to be taking a serious rest I think its well deserved here...
This Unit started as a bit of a nightmare and I've had to kill myself to catch up I just hope I achieved something of worth in this time and people don't think that Ive been lazy because that cannot be further from the truth.
Hope everyone is having tonnes of fun!
Over & Out,
xXStItChXx
Another small update but there will be no time tomorrow as everything will be printed I am just going to be adding effects and sound all day. I will finish my Art of booklet tonight as well which I will have to delay until after I have my 12 render passes.
I decided to simplify this design because the person who commissioned me would not want to see everything on display all over the case, simple is sometimes more professional. The disc is what the disc is and the case is just what the commission is. To truly evolve I have to consider what the client would want not what I think looks pretty cool...
Right lets get down to the case design, enjoy people!
The image above shows my CD artwork as I said I decided to keep it very simple this time, people don't need to see my ugly mug and if they are clients they want to see what they commissioned me to do not all of the little snaggles within. Besides it keeps the whole thing interesting, kind of like "oooh ahhh whats inside?" Still, I have put my personal touch on it :)
Next came my Case Design, again very simple with one little snippet from my final animation. It actually freed up most of the back allowing me to fit in the entire creative project brief which has been a nightmare to fit in in the past. I decided to keep everything in keeping with the facebook theme I.E. the subtle blue and white I have to say its so simple that I love it.
This Unit started as a bit of a nightmare and I've had to kill myself to catch up I just hope I achieved something of worth in this time and people don't think that Ive been lazy because that cannot be further from the truth.
Hope everyone is having tonnes of fun!
Over & Out,
xXStItChXx
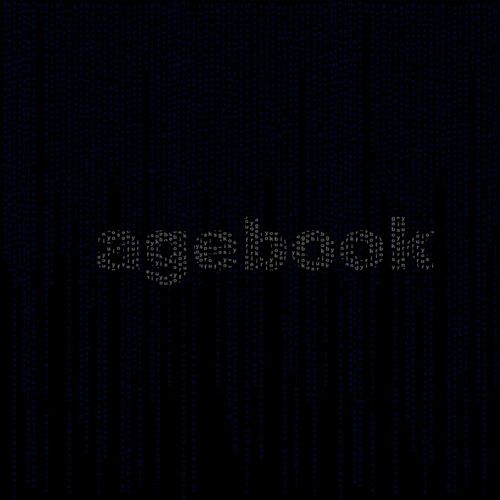
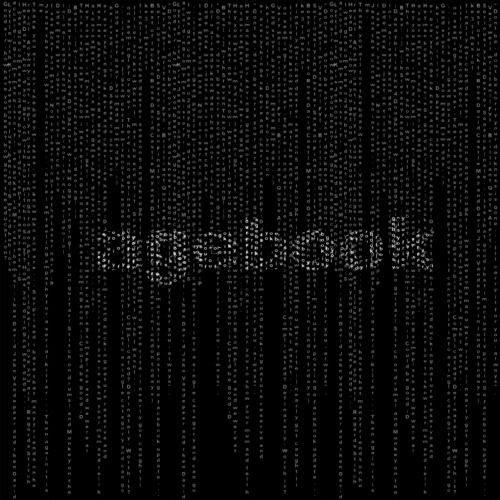
Unit 6: Commission - Agebook "Inside Facebook" CG Previz
Hello Everyone,
Coming in with my Pre-Viz (finally) I'm actually amazed I achieved this in spite of everything going on at the moment so I hope its better late then never. I have only had time in this instance to throw the music and narration in I am planning on throwing in some subtle SFX when it comes to the final animation on show for Friday.
I kept the basic textures on when I threw it out which I assumed was meant to happen way back in week 3 I just hope its more along the correct lines of what is required as opposed to what I want. I think this is what helped sink much pitch, that and the lack of educative content. Still I got Dr. Klappers opinion on my animatic so at least my educative segment is worded correctly and is seemingly okay.
Right lets get down to my CG Pre-Viz of the "Inside Facebook" segment of "Agebook".
Apologies are in order if the sound is ever so slightly out of sync or if it jitters a little I had to create my previz files on my older laptop as my newer laptop is otherwise engaged still rendering my final scene. I also forgot to turn off the window mode as well so you can see all of the lines but I figured that will do for this at least it syncs up rather nicely with the narration and the music is perfect for it.
Well I think that concludes this little post I have a few other things to consider but I may just include everything else in my booklet which is gonna be fitted inside my agebook DVD sleeve. If anything I'm a little gutted that I was confused at the beginning of this brief I could have much more hand drawn development, alas it took me a while to find my footing - which can happen. Oh well I guess I'm losing my mind ever so slightly lol!
See you in the funny pages!
Over & Out,
xXStItChXx
Unit 6: Commission - After Effects Week 4
Hello Everyone,
Here it is the final developments before the big push tomorrow. First in line is the final after effects lesson I checked the group blog to find out that the Maya deadline has been extended (thank god) because yeah there was no way that was being completed by Friday. Loving the development I'm seeing on my classmates blogs very nice shizzam!
Erm if I do my job correctly there should be 3 other blog posts that follow this one and then I get to sit down and blast out the Art of for the rest of today. Tomorrow is committed entirely to post editing SFX and Special FX probably all night I would hate to break my post crit ritual.
Anyway lets get down to Week 4's After Effects Videos - Enjoy!
We began the lesson by grabbing an image from google which was a rocket man stock image we were then to experiment with motion paths as well as the puppet morph tools which would allow us to move and deform objects with a mouse rotation. This would save us creating millions of key frames which was a nice little trick to have under the belt.
Pete then left us to play with an object of our choosing using some of the methods sadly the only thing I got time to play with was the motion path tool which allowed me to create a pretty nifty bouncing ball effect liken to our previous Units. Sadly I didn't get down to the squashing and stretching but I did but a nice rotation value into a precomp which allowed for a pretty awesome moving effect.
Last but not least we got to the tracking section of the lesson which despite it being a little fiddly was quite a decent thing to know. We were to project an image to a building on the background and use camera tracking to keep it moving in time with the video. It was pretty cool but I did notice a funky thing about it when it came to foreground objects which disappear behind the image... a little annoying. I'm assuming there is a way round.
Well that concludes this little post I will be following with previz and a few other little things before today is up hopefully sooner rather then later I'm going to need quite a long time to get my Art of together... I guess the normal thing to do is to ask that people wish me luck LOL!
Take it easy people!
Over & Out,
xXStItChXx
Tuesday, 22 May 2012
Unit 6: Commission - Lighting & Texture Tests
Hello Everyone,
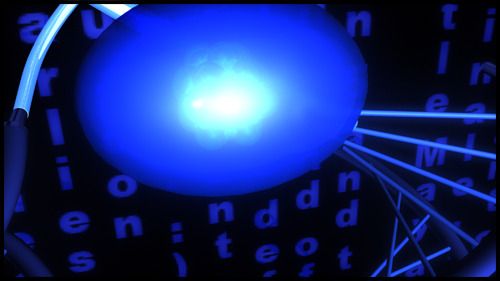
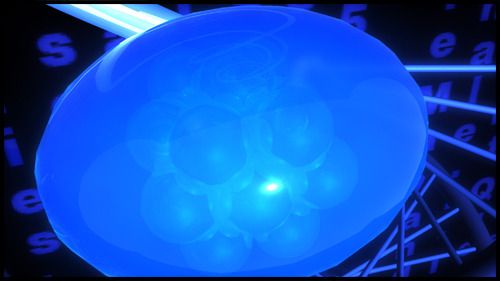
Been piecing together my exploits over this and last week, the UV Mapping came before this with the textures all of this had to be cleaned up a little bit and put into a format that can be put onto the blog without insane loading times. To top it off I'm doing all of this on my older laptop as my new one is currently rendering out a Hench render of my end sequence.
The images in this post are the entire development of my CG idea. Every time after I completed a scene I moved to the temp folder and emptied the contents which were all of my test renders while I was familiarising myself with textures and lighting. This should demonstrate not only my lighting and texture development but the development of my final art style.
Please enjoy my test renders - final developments. (Click them to enlarge)
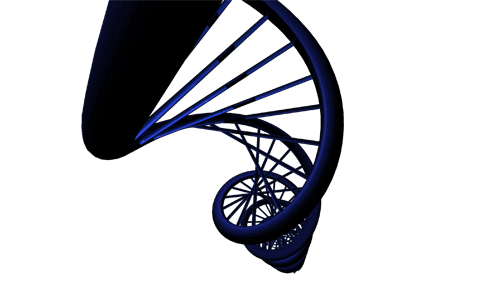
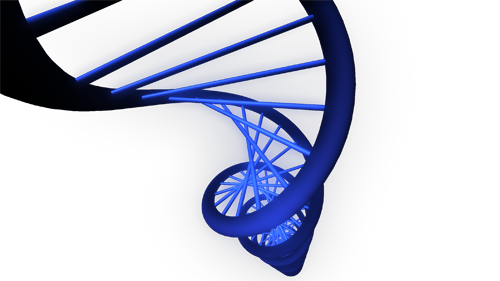
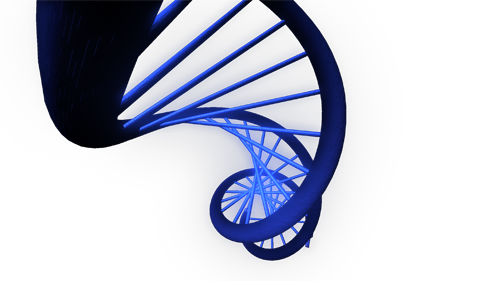
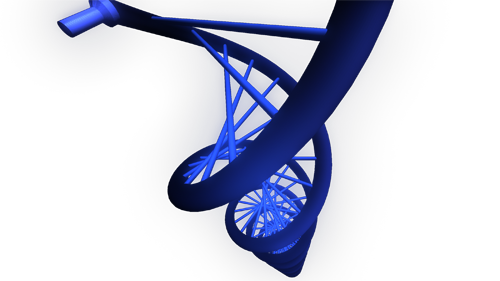
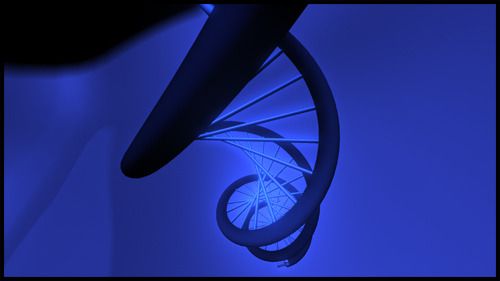
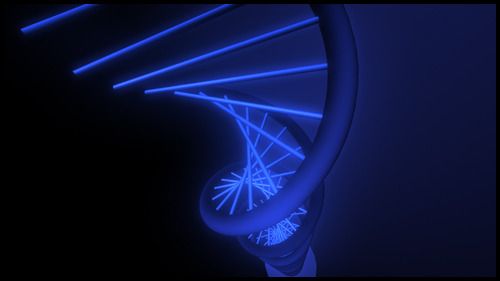
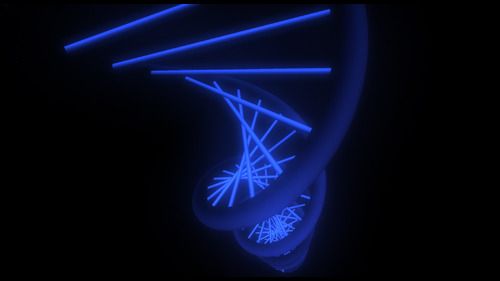
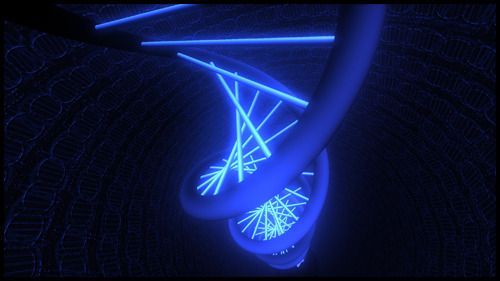
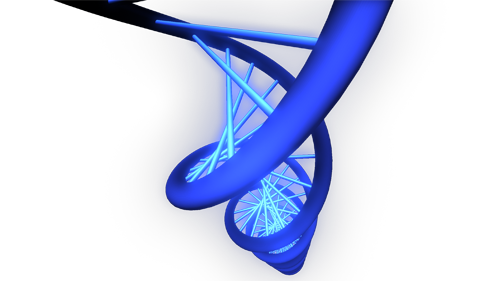
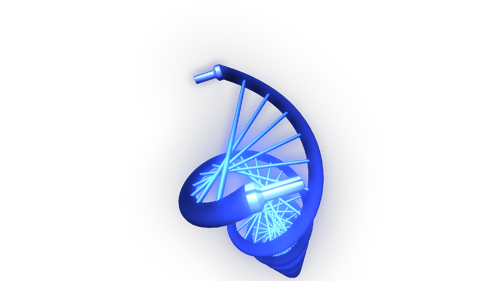
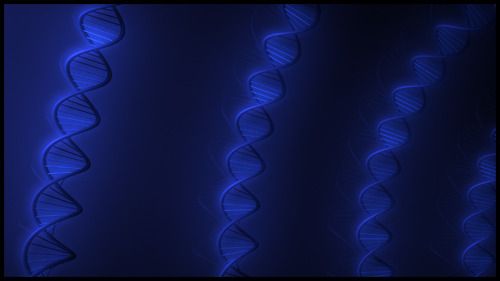
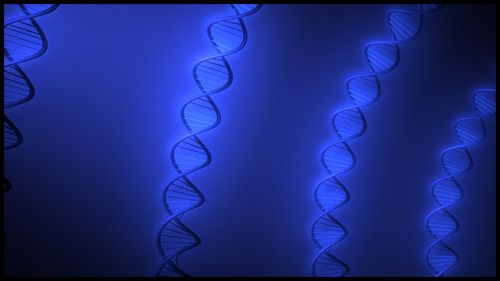
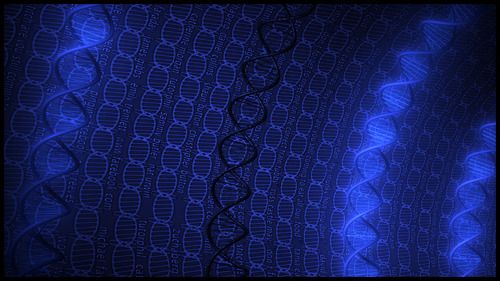
Scene 2 - Spiralling DNA
Scene 2 was where everything was up in the air I knew how I wanted the interlude to work but I had no idea how it would look with the narration. The first image shows that originally I had it to a very cartoon style but it didn't feel right. I started playing around with the spot light with a basic blinn but that didn't feel right either.
The glow was then added and things started becoming more lively, I sat with a spec map for quite a while as well. I was even undecided about the background which changed a few times until I decided to leave it off and add my own background, I did this just to have a little fun in after effects.
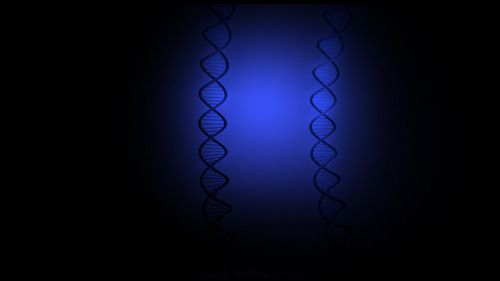
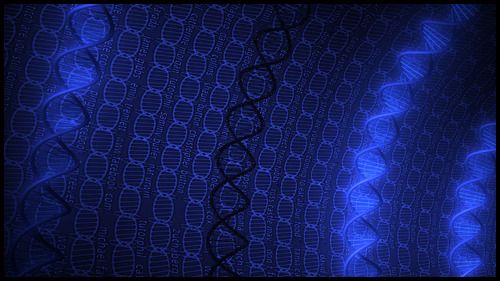
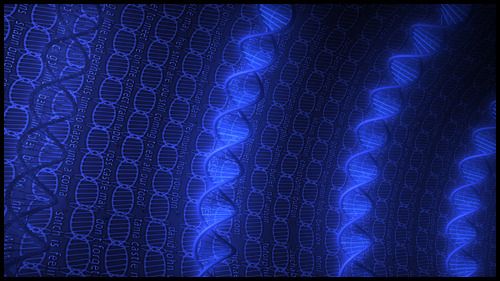
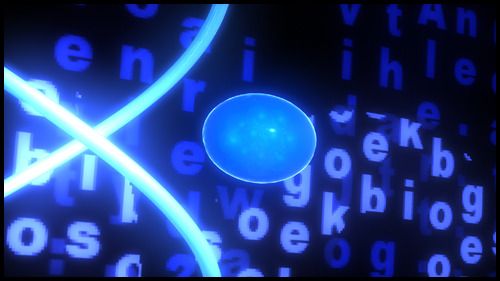
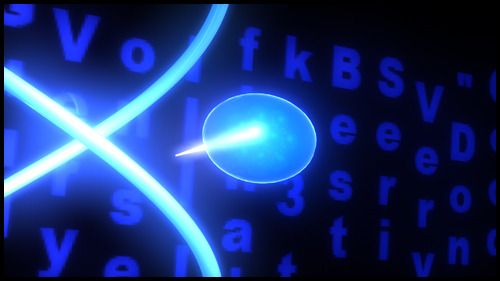
Scene 3 - Dying DNA
Scene 3 was where I had to seriously start experimenting with the bend modifier I also had to consider the movement of my strands which I wanted bent but also able to fully animate. I was also stuck for texture ideas, I didn't see the point of creating an entire room that I wouldn't use so I kept it to a single half pipe and what I projected onto that wall would be my background.
At this point I just thought id keep it to the texture used in Scene 1 - Tunnel of genes. I just didn't want to over complicate anything in case I didn't have it ready in time.
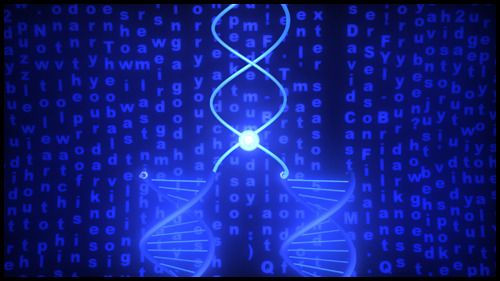
Scene 5 - Primer Emerges
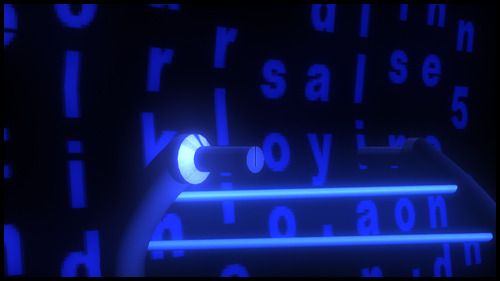
Scene 5 was where I had to consider different shaders my blue spot light would make anything I placed blue but I didn't want a solid primer I wanted it to appear as if it was made of glass. It felt like it fit the theme of my video more openly with a mechanical feel as opposed to a human feel.
The plane behind I wanted facebook messages or notes I arranged it in the ever popular method of the Matrix devoid of code of course. This was where spec maps became fundamental for shining up specific words of text. The entire specular effect really emanated well with the glows of my visual objects.
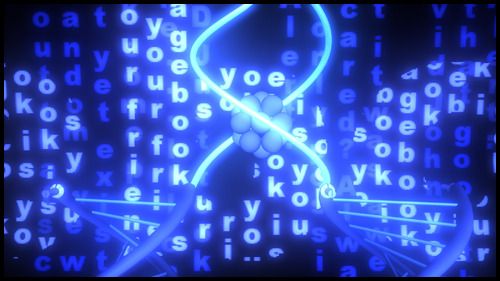
Scene 6 - Polymerase Copies DNA
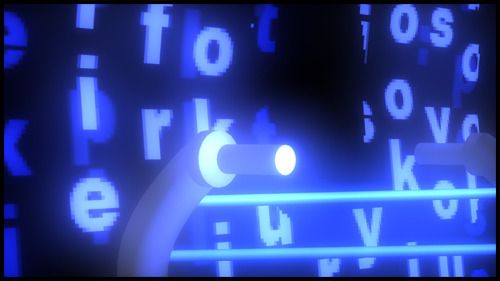
Scene 6 was a very long process but with all considered it turned out better then I could have ever hoped. I decided to reuse my background and keep it looping and turn my attention to animating my little polymerase up a chain of DNA. Creating the extrude shapes took forever but it actually ended up looking like the polymerase were laser fitting the DNA strands from the ground up.
Moving the shape around was another thing I had to consider which became easier when I centred the pivot onto the tip of the beam. The shader took a while to perfect as I had never used Incandescence before and now that I have I can quite frankly say its the light Sabre effect.

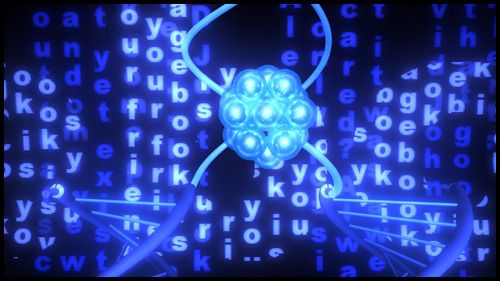
The Image above is a close up of what I was talking about above although it is not without its flaws - notice the beam to the right is not connecting to the DNA strand and its because the strand is slightly out of alignment due to the rotation from a prior scene. While it is not perfect it is still better then what I thought I could achieve and regardless of grade I think it conveys a digital world quite well with all of my super nice illuminations.
I really enjoyed playing with shaders more so then I ever have trying to work out the formula for UV Mapping. I will certainly be looking into these things more over summer hopefully with a few things I have lined up...
Scene 10 - Telomeres - Protective Tips
Scene 10 was my weakest moment here, I couldn't figure out how to degrade the tips of my telomeres in the video so I decided to try and synthesise something up in after effects. The ends are quite primitive which is another reason why I am not very happy with their final outcome.
Time constraints caught up to me as well as other things so I had to pull the trigger here. Still I think the video as a whole is better then it could have been back when I was terrified of approaching this video. To be at the end of it a little wiser makes me feel great... To be honest I'm already happy that the final scene is rendering I need a vacation lol.
Okay well that concludes the development process of this video with my lighting tests and texture tests. There are scenes missing from this because some were so cut and dry I just moved them to where I needed them and hit render.
Plus I'm pretty sure some of them did not kick out temporary renders which I found quite annoying but I assume all of the tests above will suffice and fill my client with the confidence that I haven't been sitting on my hands for the last few weeks.
Take it easy people!
Over & Out,
xXStItChXx
Been piecing together my exploits over this and last week, the UV Mapping came before this with the textures all of this had to be cleaned up a little bit and put into a format that can be put onto the blog without insane loading times. To top it off I'm doing all of this on my older laptop as my new one is currently rendering out a Hench render of my end sequence.
The images in this post are the entire development of my CG idea. Every time after I completed a scene I moved to the temp folder and emptied the contents which were all of my test renders while I was familiarising myself with textures and lighting. This should demonstrate not only my lighting and texture development but the development of my final art style.
Please enjoy my test renders - final developments. (Click them to enlarge)
 |
 |
 |
 |
 |
 |
 |
 |
 |
 |
 |
 |
 |
 |
Scene 2 was where everything was up in the air I knew how I wanted the interlude to work but I had no idea how it would look with the narration. The first image shows that originally I had it to a very cartoon style but it didn't feel right. I started playing around with the spot light with a basic blinn but that didn't feel right either.
The glow was then added and things started becoming more lively, I sat with a spec map for quite a while as well. I was even undecided about the background which changed a few times until I decided to leave it off and add my own background, I did this just to have a little fun in after effects.
 |
 |
 |
 |
 |
 |
Scene 3 was where I had to seriously start experimenting with the bend modifier I also had to consider the movement of my strands which I wanted bent but also able to fully animate. I was also stuck for texture ideas, I didn't see the point of creating an entire room that I wouldn't use so I kept it to a single half pipe and what I projected onto that wall would be my background.
At this point I just thought id keep it to the texture used in Scene 1 - Tunnel of genes. I just didn't want to over complicate anything in case I didn't have it ready in time.
 |
 |
 |
 |
 |
 |
Scene 5 was where I had to consider different shaders my blue spot light would make anything I placed blue but I didn't want a solid primer I wanted it to appear as if it was made of glass. It felt like it fit the theme of my video more openly with a mechanical feel as opposed to a human feel.
The plane behind I wanted facebook messages or notes I arranged it in the ever popular method of the Matrix devoid of code of course. This was where spec maps became fundamental for shining up specific words of text. The entire specular effect really emanated well with the glows of my visual objects.
 |
 |
 |
Scene 6 was a very long process but with all considered it turned out better then I could have ever hoped. I decided to reuse my background and keep it looping and turn my attention to animating my little polymerase up a chain of DNA. Creating the extrude shapes took forever but it actually ended up looking like the polymerase were laser fitting the DNA strands from the ground up.
Moving the shape around was another thing I had to consider which became easier when I centred the pivot onto the tip of the beam. The shader took a while to perfect as I had never used Incandescence before and now that I have I can quite frankly say its the light Sabre effect.
The Image above is a close up of what I was talking about above although it is not without its flaws - notice the beam to the right is not connecting to the DNA strand and its because the strand is slightly out of alignment due to the rotation from a prior scene. While it is not perfect it is still better then what I thought I could achieve and regardless of grade I think it conveys a digital world quite well with all of my super nice illuminations.
I really enjoyed playing with shaders more so then I ever have trying to work out the formula for UV Mapping. I will certainly be looking into these things more over summer hopefully with a few things I have lined up...
 |
 |
Scene 10 was my weakest moment here, I couldn't figure out how to degrade the tips of my telomeres in the video so I decided to try and synthesise something up in after effects. The ends are quite primitive which is another reason why I am not very happy with their final outcome.
Time constraints caught up to me as well as other things so I had to pull the trigger here. Still I think the video as a whole is better then it could have been back when I was terrified of approaching this video. To be at the end of it a little wiser makes me feel great... To be honest I'm already happy that the final scene is rendering I need a vacation lol.
Okay well that concludes the development process of this video with my lighting tests and texture tests. There are scenes missing from this because some were so cut and dry I just moved them to where I needed them and hit render.
Plus I'm pretty sure some of them did not kick out temporary renders which I found quite annoying but I assume all of the tests above will suffice and fill my client with the confidence that I haven't been sitting on my hands for the last few weeks.
Take it easy people!
Over & Out,
xXStItChXx
Unit 6: Commission - Textures and UVs "Inside Facebook"
Hello Everyone,
Sorry I have been MIA, been playing about with my final animation and ultimately decided to get things finalised. Texturing is and always will be my weakest point when it comes to 3D modelling, the textures usually always either come out too big or too small and even then chances are that they have stretched in a certain way. Enough though I did not come here to moan, I just came on to post the few textures I actually did use.
There are 2 days to go and I have been keeping a cautious eye on the blog's plenty of nice visuals going on I have to say, its making me doubt mine a little. Regardless I tried my best and I still have quite a few bits of after effects to put into play here.
Anyway lets get onto my Textures and UVs for my "Inside Facebook" CG Sequence.
The images above (1 & 2) are the UV maps for my DNA strand and revolving background. The map was actually quite simple to make as it was just a hollowed out cylinder of course I had to remap the polygons to the front. I didn't want to get lost in trying to build complex shapes with complex UV maps shaders were my end focus and they worked out pretty well. Regardless the DNA strands and the looping backgrounds were comprised of my texture work and were nice and simple.
Images 3 & 4 were last minute creations. The telomere tips on my DNA strand were not lighting up when I zoomed in on them so I had to give them a spec map to get the glow effect that I needed. 3 was a revolving DNA wall which I am using to convey a world that is very much alive. The UV mapping was not working for a few of these so lots of minor alterations were made to the model including a couple of complete remaps.
I began with the 3 maps above which were not created as traditional UV maps. I made the textures and then fit them to the geometry retroactively in the scene. I knew they were only spiralling around a pipe so I could get away with a cheap move or two. The image to the left is the texture I was using originally but I ultimately did not use this texture as the spec and the bump were all that was required to get a decent scene. My initial bump is in the middle but when I added text this version was scrapped. The image to the right is my spec map and when I altered this the same changes went to the bump map.
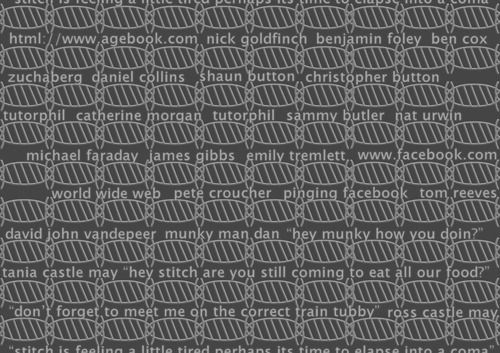
My revised bump (shown above) was the final creation for the tunnel concept which ultimately was used for my final animation. Kudos if you are in the list I just grabbed a bunch of recent posts from facebook etc to create this backdrop. You will see the same thing used throughout most of my texturing. I wanted to keep everything at home but deep down to where we cannot possibly imagine.
The image above was a test image that I built when I was starting on my gene texturing, I laid the texture on the map when no surprises to me it stretched it and pixellated it far worse then I could have ever imagined possible. This was when I accepted the reality that any form of true grit was not possible in the time frame I had remaining. So I stepped back...
...And considered more basic textures, colour hues, with spec and bump values. This turned out to be more favourable as the textures did not look like complete crap. The tips were irrelevant to me at this point the ones on the strands of DNA would never be seen as they were physically inside the DNA strands sides. The specular map ended up becoming more important then the bump as the bump only made my DNA look old and broken so I decided to save it for a scene when a DNA strand would die.
The specular map kept becoming my highlight, more important then texture colouring as my scene mostly revolves on glows and high brights. Any on scene texture is kind of lost in the thick of it without a spec or some kind of incandescence. It just became more favourable and time sensible to be considering shaders more then maps without the uphill battle of mapping.
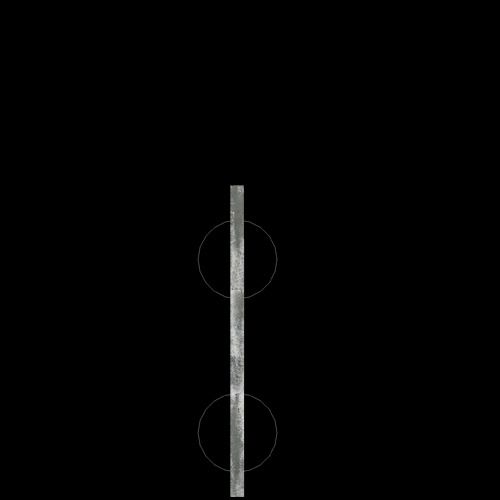
One of my final scenes gave me a little more of a run for my money when a required close up showed some very annoying UV template which I hadn't removed. This gave birth to the map above which I made specifically for this scene. You may notice that there are no textures for this, because as I said at this point spec maps were all I needed to continue my flow.
If I had more time I would be considering a few other things regarding mapping and getting everything much more tighter but at this point I'm a little drained and my lack of sleep is beginning to cost me lots of friends (facebook get it? LOL) I mean sanity.
Right I am off to get a few other bits done, might be posting up an another little update in a bit regarding my texture woes and various methods of lighting.
I hope everyone else is having a scream of a time...
Over & Out,
xXStItChXx
Sorry I have been MIA, been playing about with my final animation and ultimately decided to get things finalised. Texturing is and always will be my weakest point when it comes to 3D modelling, the textures usually always either come out too big or too small and even then chances are that they have stretched in a certain way. Enough though I did not come here to moan, I just came on to post the few textures I actually did use.
There are 2 days to go and I have been keeping a cautious eye on the blog's plenty of nice visuals going on I have to say, its making me doubt mine a little. Regardless I tried my best and I still have quite a few bits of after effects to put into play here.
Anyway lets get onto my Textures and UVs for my "Inside Facebook" CG Sequence.
 |  |
The images above (1 & 2) are the UV maps for my DNA strand and revolving background. The map was actually quite simple to make as it was just a hollowed out cylinder of course I had to remap the polygons to the front. I didn't want to get lost in trying to build complex shapes with complex UV maps shaders were my end focus and they worked out pretty well. Regardless the DNA strands and the looping backgrounds were comprised of my texture work and were nice and simple.
 |  |
Images 3 & 4 were last minute creations. The telomere tips on my DNA strand were not lighting up when I zoomed in on them so I had to give them a spec map to get the glow effect that I needed. 3 was a revolving DNA wall which I am using to convey a world that is very much alive. The UV mapping was not working for a few of these so lots of minor alterations were made to the model including a couple of complete remaps.
 |  |  |
I began with the 3 maps above which were not created as traditional UV maps. I made the textures and then fit them to the geometry retroactively in the scene. I knew they were only spiralling around a pipe so I could get away with a cheap move or two. The image to the left is the texture I was using originally but I ultimately did not use this texture as the spec and the bump were all that was required to get a decent scene. My initial bump is in the middle but when I added text this version was scrapped. The image to the right is my spec map and when I altered this the same changes went to the bump map.
My revised bump (shown above) was the final creation for the tunnel concept which ultimately was used for my final animation. Kudos if you are in the list I just grabbed a bunch of recent posts from facebook etc to create this backdrop. You will see the same thing used throughout most of my texturing. I wanted to keep everything at home but deep down to where we cannot possibly imagine.
The image above was a test image that I built when I was starting on my gene texturing, I laid the texture on the map when no surprises to me it stretched it and pixellated it far worse then I could have ever imagined possible. This was when I accepted the reality that any form of true grit was not possible in the time frame I had remaining. So I stepped back...
 |  |  |
...And considered more basic textures, colour hues, with spec and bump values. This turned out to be more favourable as the textures did not look like complete crap. The tips were irrelevant to me at this point the ones on the strands of DNA would never be seen as they were physically inside the DNA strands sides. The specular map ended up becoming more important then the bump as the bump only made my DNA look old and broken so I decided to save it for a scene when a DNA strand would die.
 |  |
The specular map kept becoming my highlight, more important then texture colouring as my scene mostly revolves on glows and high brights. Any on scene texture is kind of lost in the thick of it without a spec or some kind of incandescence. It just became more favourable and time sensible to be considering shaders more then maps without the uphill battle of mapping.
One of my final scenes gave me a little more of a run for my money when a required close up showed some very annoying UV template which I hadn't removed. This gave birth to the map above which I made specifically for this scene. You may notice that there are no textures for this, because as I said at this point spec maps were all I needed to continue my flow.
If I had more time I would be considering a few other things regarding mapping and getting everything much more tighter but at this point I'm a little drained and my lack of sleep is beginning to cost me lots of friends (facebook get it? LOL) I mean sanity.
Right I am off to get a few other bits done, might be posting up an another little update in a bit regarding my texture woes and various methods of lighting.
I hope everyone else is having a scream of a time...
Over & Out,
xXStItChXx
Subscribe to:
Posts (Atom)