Sunday, 5 May 2013

Unit 9: Adaptation - Driver Posed - Complete

Hello Everyone,

I spent most of yesterday finalizing my Driver's posing, that is why thee low poly post was so late, I wanted to capture something cool. After trying numerous exaggerated poses I found solace in one of my first... Now everyone who is curious as to how I posed my Driver without any Rigging well I'm about to tell you. Throughout the course of this post you will learn the trick for creating a pose for conceptual purposes. In this case I even managed to still get the UV maps to work even after the model was posed... This is one of the other reasons I kept the pose simple...

Now everyone knows that my project has been largely focused on using ZBrush as an all encompassing tool. I have only really been in Maya to build the Driver and to keep his poly-count low, also his UVs were done in Maya. Lots of my renders are done in ZBrush but of course you have to bring them into Maya to see if they work outside of ZBrush. So if anything Maya has been used as a testing ground to make sure my models textures have been painted and lit correctly. Now for everything else poly-painting, emotions, posing, has been completely ZBrush...

I will explain the evil genius behind transposing and of course expressions!
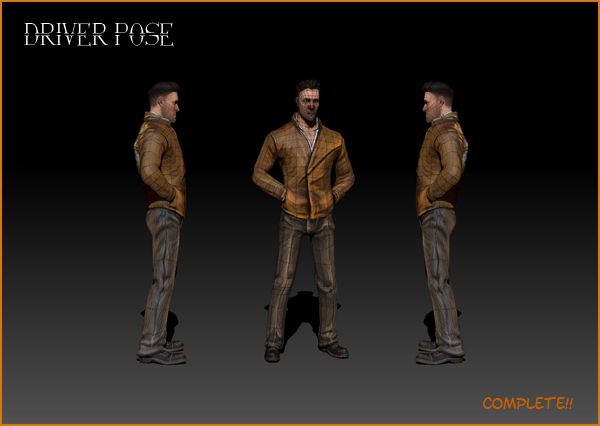

The Driver Pose image above is the choice I made after an elongated list of rejects. I could post up each individual test but if I'm honest this was by far the best so lets keep it about this. Basically posing a character in ZBrush requires one to use masking on the lowest divide of a model using a transpose tool to move it where required. When you have posed the model you can move back to the top divide and all the low polys associated with the high polys have moved to accommodate the geometry you have moved. You then use ZBrush's tools to fill out and deform the model so it looks correct...


Next I dived into my Driver's expression and I had a range to choose from largely due to my other expression line ups. I decided to recreate them all using the final mesh and poly-paint. From these I was able to make an informed decision about where I wanted to go with his expression for the Final Turnaround. These were created using ZBrush's move tool which is not unlike Mudbox's Grab tool, the only difference is ZBrush's is 1000 times better. It allows you to move the muscles of the face without creating deformation or requiring any kind of smoothing...


The videos above show me creating a single expression in ZBrush using its amazing Move tool. There are also 2 others that illustrate me posing the Driver using masking and eventually transpose axis's to move his arms into the folds of the Jacket. I had another video in between these but ZBrush crashed when I was recording it so sorry that you don't get to see the full picture. Rest assured the pose did actually take 2 hours to get right. I used the move tool to ball up his Jacket a little and then I ran his hands through it... This gives the illusion that his hands are in his Jacket Pockets...

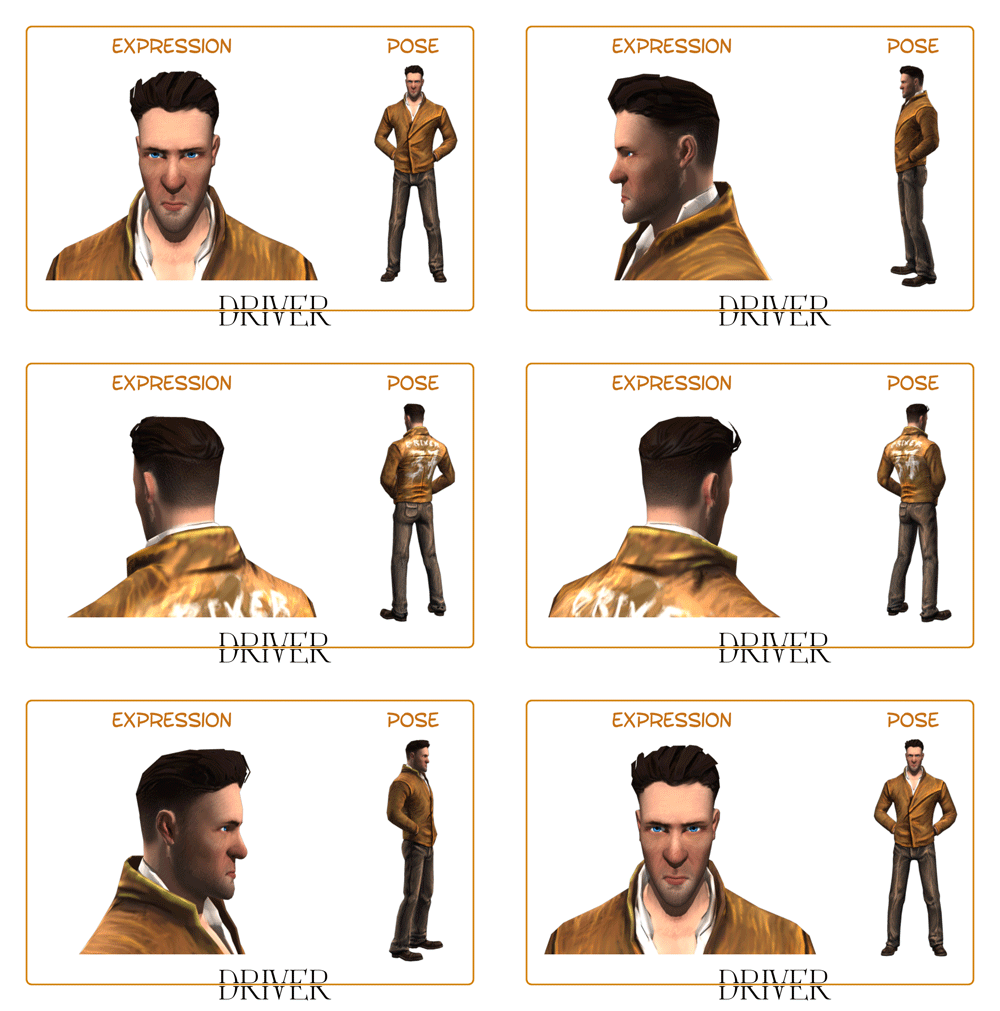
Next I have decided to show my main choice for the Driver's final expression (shown across 3 stages of development). I asked my Nephew to make a decision and like Tom and Phil he liked the "Business" expression. I did think about adding a Cigarette. I may still do that if there's time... It's quite cool to put these 3 images together because you can kind of see the same motivation in each of their eyes I think that's one thing I'm glad that he hasn't lost in his development. He still has the piercing blue eyes that can see through any corner or back alley... Perfect for a professional Driver...
Last but not least here is the final pose and expression demonstrated on a render from Maya on my Low Poly model. The UV mapping is still working perfectly and the pose if I don't say so myself is a good shot of who he is... You want to check out my inspiration? I will post it below for you to get a feel for. I suppose I also am sympathetic to this pose because I have to do put my hands in my Jacket pockets all winter long. Before you get any big ideas... No driver is in no way based on me he actually looks cool I'm a weird looking dude!


I hope I am not getting ahead of myself with all of these posts but what can I say this character has been severely thought about. The other poses I tried just all felt too much, as Phil said during the Crit "he's a cool character that every man wants to be" he doesn't panic, he doesn't rattle, he Drives... that's it. In this case the pose took a while to get right, mainly because I couldn't get the right intensity for the move tool. Everything kept bunching up but I am happy with this result... You have to be careful using transpose like any tool, you can do too much if you are not careful...

I think I can appreciate that less is more... Each time I tried adapting his pose it felt like something he wouldn't do in a million years. I even had a running stance at once point. Trust me you will all be glad I deleted them a while ago. Anyway I think that concludes this post really. I will be back later tonight hopefully with some further development for the Day Car which I have been juggling while doing hour long posts like this one lol. I think the next few days will be sleepless just so I can get all of this complete... I just cant stop!!

Take it easy!!
xXStItChXx

Saturday, 4 May 2013

Unit 9: Adaptation - Driver Textured - Complete

Hello Everyone,

Well I am a man of my word, I am here to post up the textured low poly version of my "Driver" for this project. I still have yet to do the Stage 3 concept but that is a mere fly in the ointment as I now have the version that will be the game asset. Most of my time was spent making sure the normal maps were tight in the key places. I have also been trying to come to grips with folds and wrinkles in clothing as I wanted my texture maps to be as accurate as possible. This meant I spent a lot of time texturing and then re-texturing just to make sure the folds made sense...

I am pleased to say that I am at a place where I am happy with the model to show it to the masses (whoever they may be). Please just be delicate with your opinions I put a lot of hours in on this guy as I knew he would be the key thing about this project. I kept the painterly style recommended by Phil and Alan in our Crit taking the cue from my Night Car also. I did this by starting with a projection map of the Jacket, from there I managed to fill the entire Jacket. I moved onto the trousers and beyond there after... I got a few videos but again I didn't record everything... sometimes the videos don't save properly so you have to be careful...

Anyway I will now do the big unveil of my 3952 poly Driver.


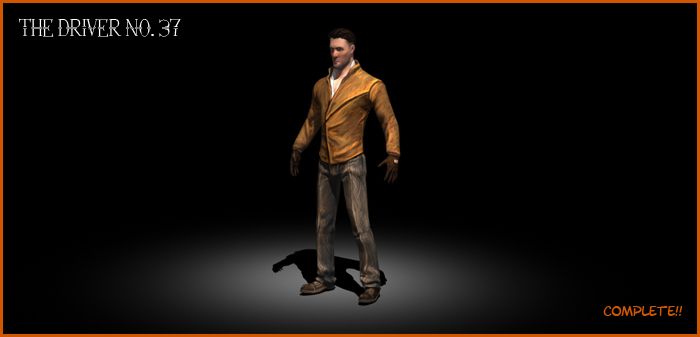
I am doing the same kind of thing that I did for the Night car textured post. The image above (Driver 37) shows my 3952 poly Driver with ray traced shadows. A white spotlight with a drop off rate and slightly higher intensity is what illuminates the scene. The render is from Mental Ray (as are they all - Maya Software makes normals look horrible) with a production 720p quality. The mesh as a slight ambient glow on it but the diffuse is at 100% for a full range of colour. Believe it or not that mesh is under 4000 poly... I'm still having a hard time believing it... It looks higher!!!


The videos above show some of the development steps for the Driver in ZBrush. Particularly me projecting an image I drew onto his Jacket. Then the blending of the Jacket which eventually went all over the mesh (with the exception of the face). Just for good measure there are the final touches I knocked up on his individual hair strands. For those of you that do not know the point of the separate strands I will briefly explain... Hair stands can be given alphas and made partially invisible... If you have ever seen a game characters hair move in game its actually planes with paint and alphas on strips of geometry placed on the head of the character.


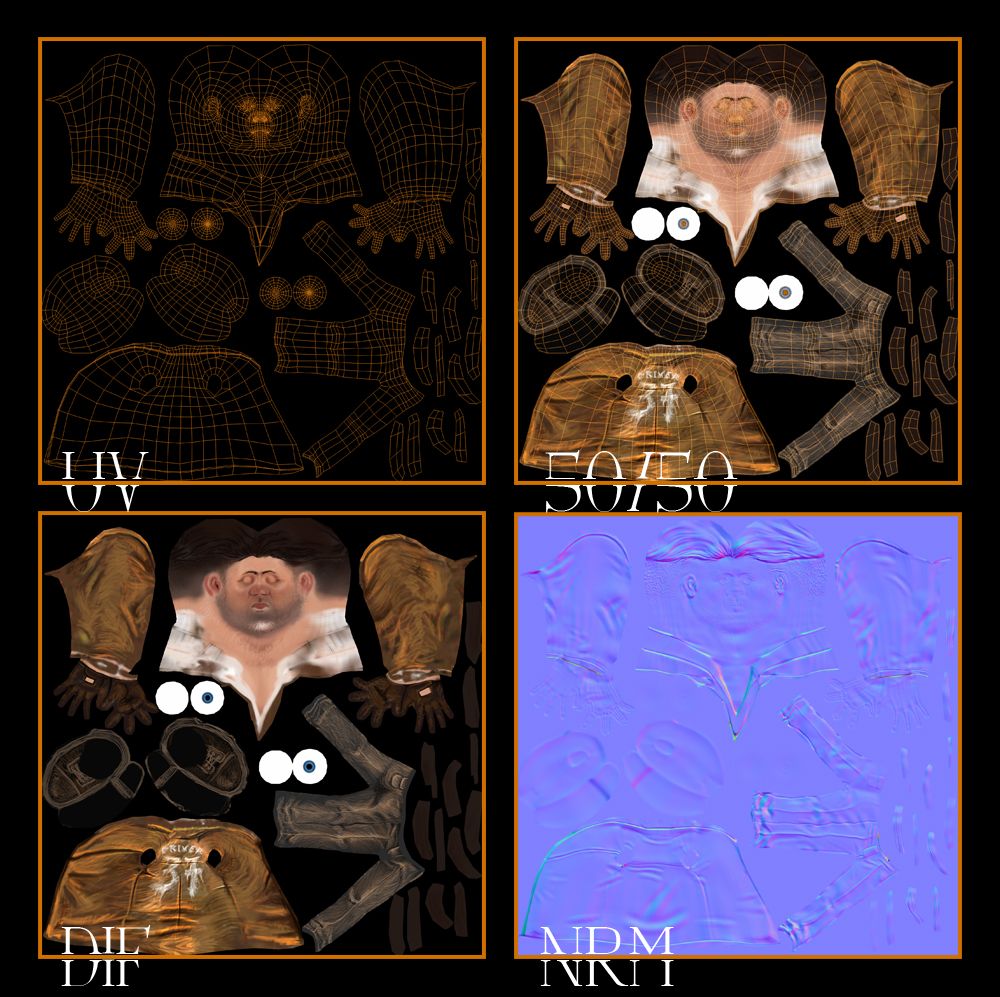
Next are of course my UV tiles now filled with Beautiful textures exported from ZBrush straight out into texture maps. The normal map is exported separately requiring me to clone the texture before exporting it out. My Driver model was actually in pieces so I had to export each individual tool and place the UVs together to make one big map. For those of you that do not know what these panels mean... The UV is just the polygonal grid to map texture coordinates. The 50/50 is a screen of the UV on top of my final textures. The DIF is my poly-paint on its own and the NRM are my normal maps that trick everyone into believing the mesh is higher poly... when it isn't.


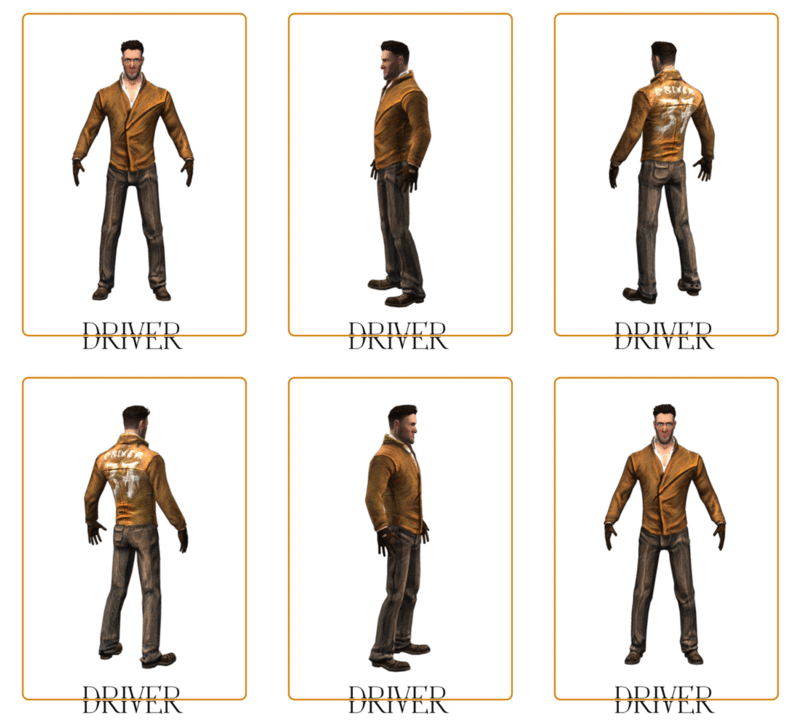
Last but not least you have the final turnaround of my Driver he is lit a little differently then the night car mainly because ambient lights washed out his texture. I wound up using 2 spot lights one in front and one behind. I tried using one but it didn't show the poly paint on his back so well. I didn't project that detail onto his back for it not to be appreciated here. I am personally amazed at the result here, there has been a lot of soul searching for this guy to look good at a lower level. As you can see though the painterly style has been adopted on all of his geometry!! He even has stubble bumps on his face :)

The main problem areas of the mesh were of course on the trousers, I had to learn quite a bit about drapery for his clothes folds to feel right. This mesh was not an easy feat and took ages mainly because of the clothing. His face was the first thing I painted along with the hair. The gloves were a last minute thing just before the Hair was sculpted. Its just a different paint mixture but damn do they look good. There's no surprises that I would take careful consideration to my Driver, everyone knows by now how much I love characters ha-ha... Anyway I think that's it for this post.

Over & Out,
xXStItChXx