Monday, 29 April 2013

Unit 9: Adaptation - Night Car Textured - Complete

Hello Everyone,

I am back with one of my 3 models complete, it has been a few days but at least the night car is completely wrapped up here. This week is going to be primarily aimed at the day car the Driver is almost ready for posting also. The night car took a little while to texture mainly due to all of the pieces. I may have to be less precious on the Day car just so I don't fall into the trap of using days on a simple texturing job. I guess ultimately I wanted my models to keep a kind of painterly feel, didn't know how to do that other then crudely paint in shade really...

I have a few development stage videos which I can share with you also to show some of my experiments with painting in ZBrush. I kind of wanted to show a slice of everything but I kind of got carried away as I do and forgot to keep hitting record. I had another little issue also with my graphics tablet which shows everything darker then it is on a 1080 screen... quite annoying. It largely means that whenever I paint and remove it from the screen it is actually 20 times brighter when I take it to another. These are all flaws I'm just learning now so I had to darken the textures too...

Anyway lets get to the final textured model here!


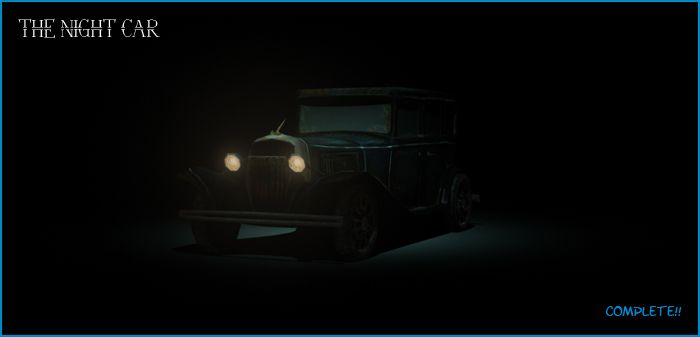
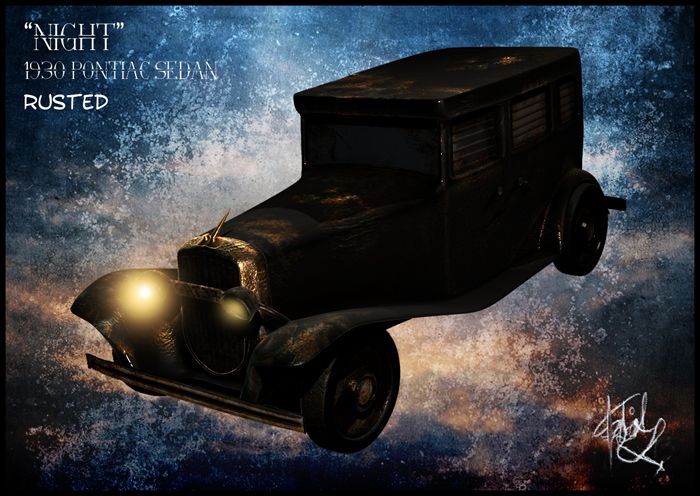
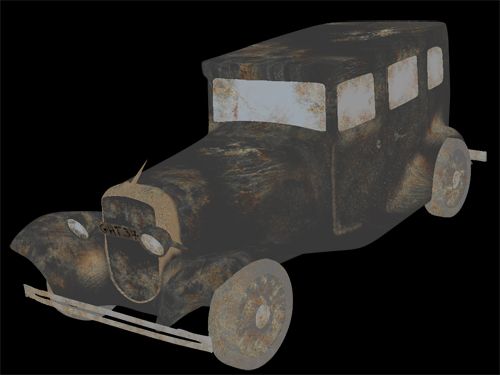
The Night Car image above is from a scene which I had been texturing up the night car on. It has a simple over head spotlight with a blue tint. The Car lights have a small glow to them but mostly they are just plates over the body geometry. I did this render mainly to see that it worked under mental rays light systems and effected my normal maps properly. One thing I did learn from this was that mental ray can actually display tangent space normals. Maya Software always seems to make them stronger then they should be.... That's one I wont forget in the future.


The videos above are some of the development steps I took throughout the texturing process. Sorry about the lack of metal panels on the windows, I completely forgot them on the final rendition of the model. We will just have to make do with normal windows I do not have time to go back and adjust it. Never the less I learnt a few nice tricks including "Spotlight" which is ZBrush's projection system. I posted a small sample from my coming to grips with that in a video above. I used it specifically with the hub caps and the lights. Its quite a cool tool I don't mind saying...


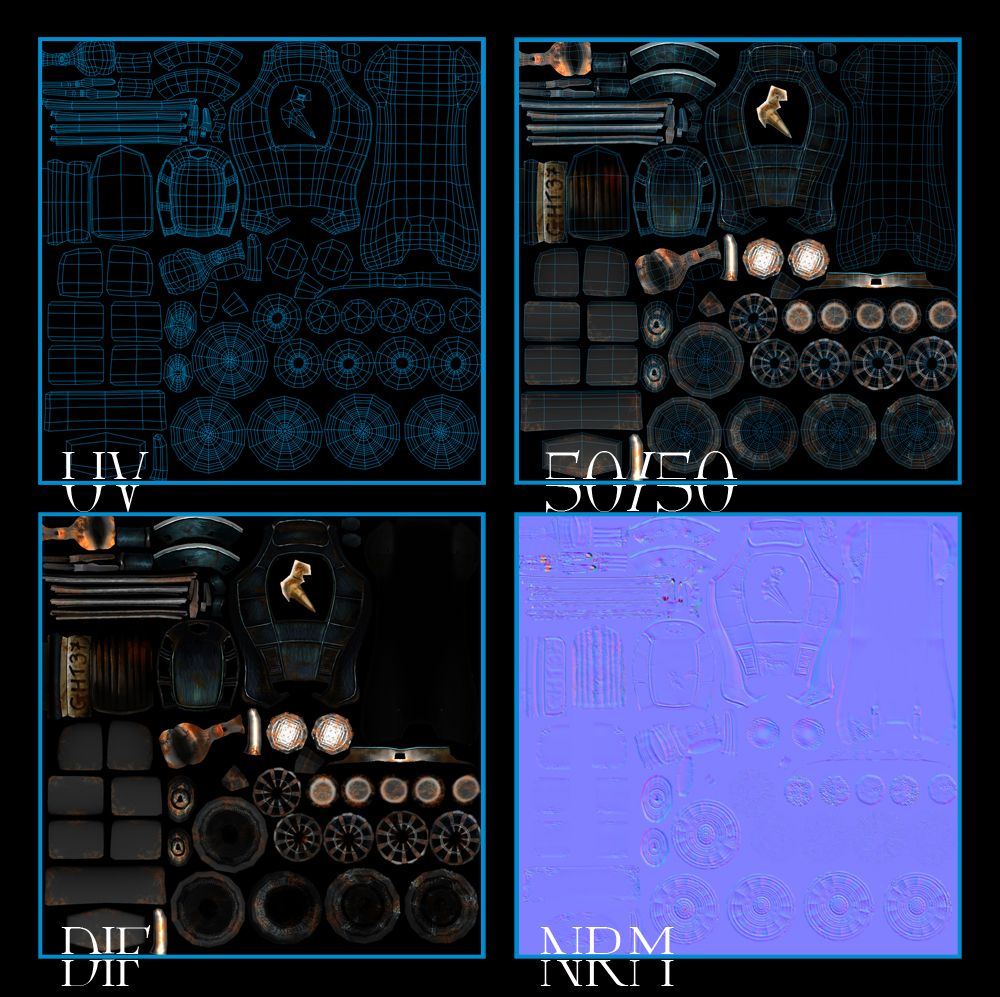
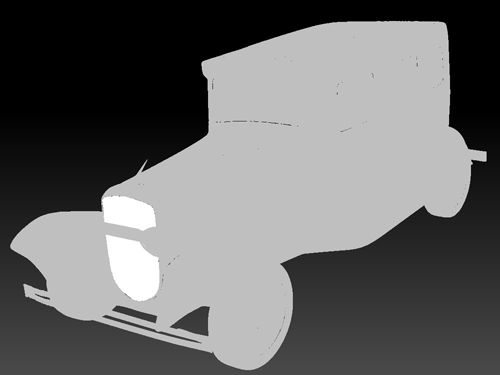
Next comes the UV Mapping for this little beast, let me tell you these maps took ages to perfect mainly because of the darkness on my tablet. Still everything worked out in the end. One thing you cannot see is the ambient occlusion maps that I baked into the DIF prior. It completely slipped my mind to save them, not that I didn't have enough random things sitting on my desktop. The depth shown in the DIF is provided by a top down ambient occlusion map that was otherwise rendered out and multiplied down onto my exported texture.

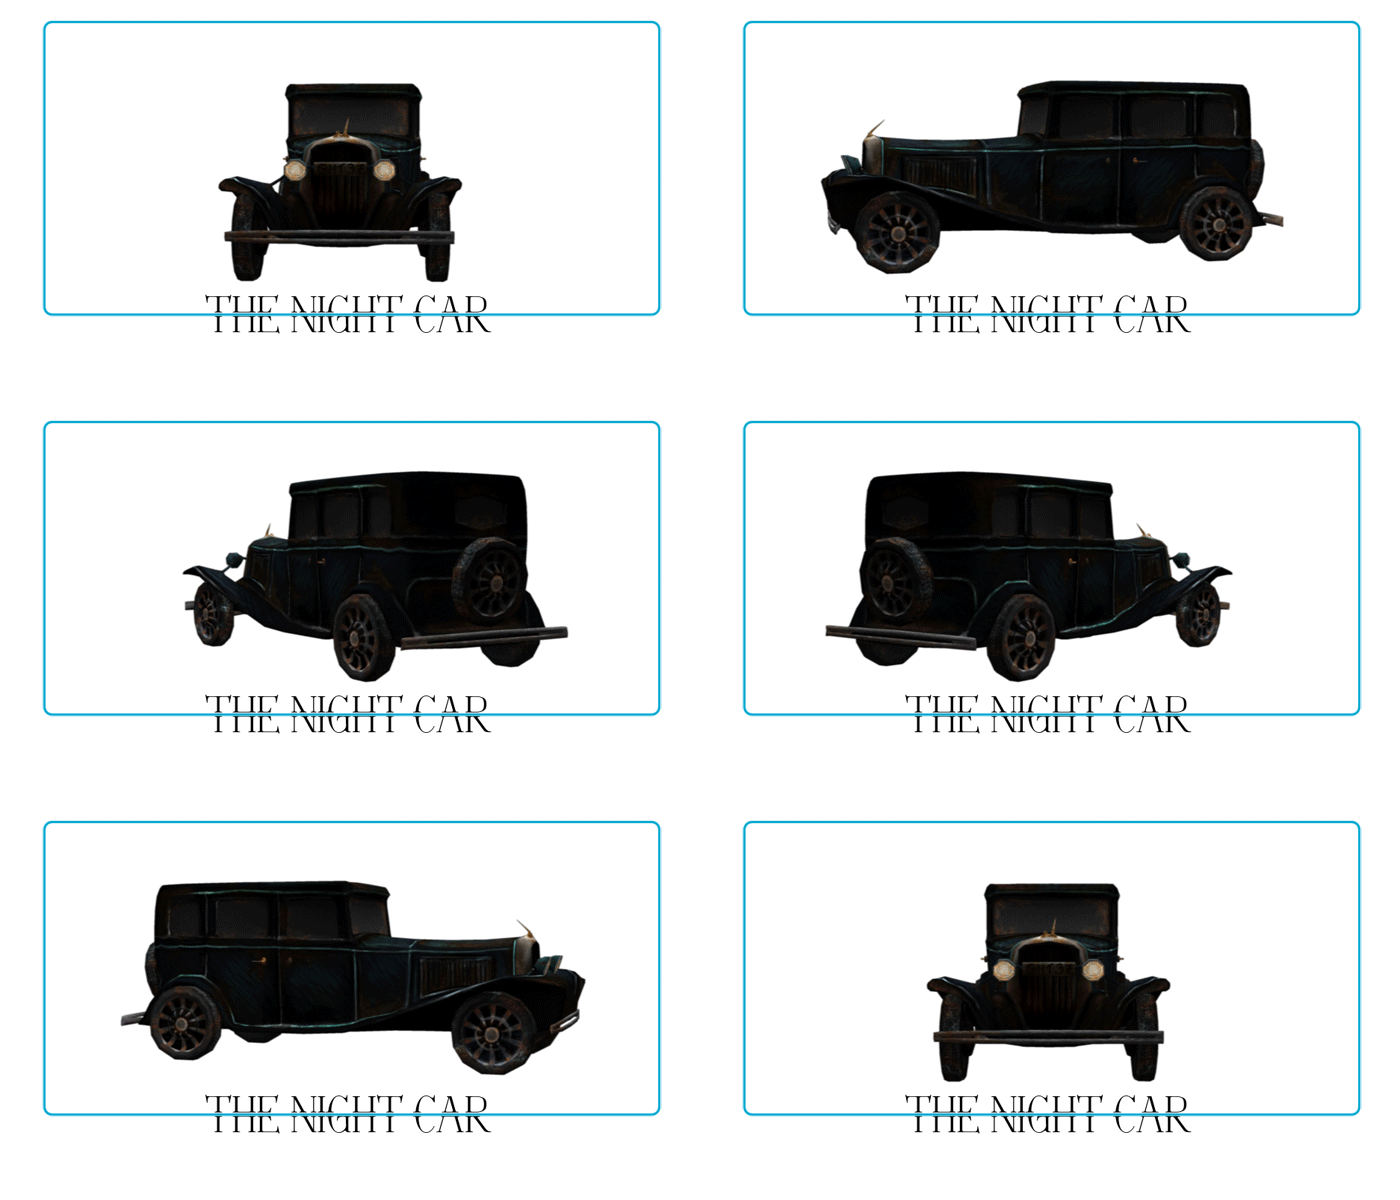
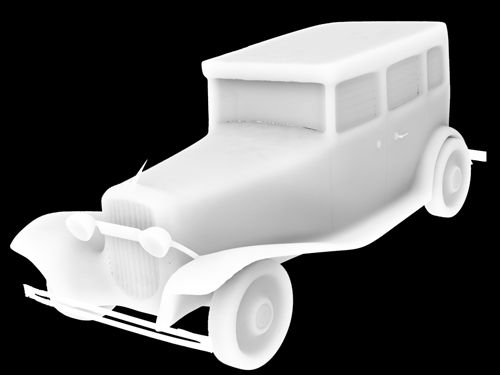
Last but not least comes a render which I did of the Night Car with an ambient light just so everyone could appreciate the detail of the textures and normals. I am actually quite chuffed at how nice this little car turned out really. Part of me just wishes I had more time to have a longer play with it but our time is coming to a close so I must venture elsewhere. Still it is quite a nice low poly model and actually looks like it could go in a game. "It's not shiny or perfect, its a bucket on wheels and it totally shows character I personally wouldn't mind driving it"... is there something wrong with me?

This now means that I have actually completed one of my models fully, now I have to get the other 2 up to scratch before Monday. Hoping I can actually do it in time, maybe if I don't sleep all week I can get double the amount of days. Not sure of my approach yet but I will adjust my time scale accordingly if needed. This car took longer then I wanted it to but I guess I just wanted it to look half decent and not some boring flat car in Maya. It has a kind of painterly feel to it now which is something I know has been missing from the concept stages...

Anyway, I am off to get my other models going, after some lunch.

Over & Out,
xXStItChXx

Thursday, 25 April 2013

Unit 9: Adaptation - Night Car Low Model Complete

Hello All,

I am back to report the completion of my low model as I have done so for the Driver and will be doing for the Day Car. I have been slaving away to get the night car as good as possible and of course got a piece of Stage 3 concept from my initial texture exchange. The model is still to be painted again (with UV maps in place) and I have to replace some of my normal detail. These will also be done over the course of the weekend and hopefully complete by the Monday with any luck. Next week I want to be putting it all together with a rough background...

In other news I have been texturing up my Driver which is actually going quite well considering he was a worry last week. Suffice to say I will have a higher map for him and hopefully a successful result once I get the hang of occlusion baking. We are literally counting down the days now till we get a sigh of relief and the chance to take it easy. It will be nice to get cracking on with a few other things that I have planned over summer including work experience in a small games company really cannot wait for that... I could be working in games sooner then I thought!

Anyway enough waffle lets get down to the "Night" model.


I basically provided the same passes that I executed for the Driver mainly because I thought they were quite cool to see on the blog. We have the standard Shaded model, a version with a UV tiled grid to show seams and of course the wire done using contour rendering. These 3 image sequences run endlessly from a single 180 frame render from Maya. Of course you have to render it 3 times using the built in turntable function from Mayas Animation Tab. I'm sure everyone knows how to do this but I recommend it if not it is pretty easy...


I do also believe that I mentioned poly-grouping in another post and here are some visuals to help (image above). Basically there is a perspective and Orthographic view in ZBrush same as Maya just in-case people were wondering the difference. The poly-groups are essentially the same as the combine/separate tools in Maya they allow you to mask and separate parts of the model. You can then split them into sub tools and thus they can be coloured individually or altered individually. This is handy because you will not accidentally hit other parts of the mesh.


Next came my standard test on the model directly, although this shows my reject version as it was yet to have a UV on every tool of the car. The body of the car however is high subdivide (6) paint on a low poly model. This helps create the illusion that the model is of a higher poly count, of course normal maps go a ways to achieving this as well. Sadly you cannot see normal maps in ZBrush as they are just mostly a models subdivide 5-6 model. Either way this model has been completely mapped now I just have to get the paint onto everything followed by my normals.


The video above shows the low and high versions of the model, in this case you will notice extra detail as this is the model I had to scrap. The scrapping of this model was mainly because I thought the UVs were due to mess up when I ported it into ZBrush to separate it. However I have learned that it makes no difference to the UV maps I just have to export the maps and project them onto a Maya Model. This essentially means I am using ZBrush as a texturing tool and not as a modelling or rendering tool. Thankfully I know how to port out the maps its really easy...


Last but not least I thought I would demonstrate what I intend to do with some visual aid (image above). Basically in ZBrush you divide the quality of your mesh and add detail to the higher as it allows more range. You then bake the normal & texture maps from the higher model into your UV map and then port it to a program like Maya, this is where I intend to get my ambient occlusion map and bake that over my texture map in photo-shop using the multiply blending mode. This gives the illusion of depth of a model and the illusion of deformation. The camera then uses these maps to create the illusion of a high model onto a low.

I am not quite out of the woods as far as post its go but I think this has put a further dent in my work load and hopefully will allow me the confidence to push on. I am a little worried about the Maya exercises primarily because I want to prioritise my project. I will probably ask what the crack is with those... last year if I recall we got a week extra to create the Maya stuff at the end. I'm kind of hoping we are afforded the same deal this year because I am way behind on Maya. Anyway I think this post is pretty much complete. Hope everyone is having fun and not missing me too much :)

Take it easy!!
xXStItChXx

Unit 9: Adaptation - Night Car UV Maps

Hello Everyone,

There has been a bit of trial and error but I am ready to get a few of the night cars final developments up and on the blog. I am a bit behind on my post its mainly because I have been learning the true process for bringing things in and out of ZBrush. As it turns out one of the ways I have been doing things was wrong which would see me going back and having to retexture my entire night car model again. I haven't done that but I did get the UVs laid out which in itself took a while mainly due to their weird way of unwrapping... The process took longer for some geometry sadly..

Anyway I am at a stage now where I can post a few updates the few which I intend to do for each model as and when. This weekend will primarily be committed to the day car only purely because its the only thing I have yet to take further. I will be painting and normal mapping the night car once again probably tomorrow. Saturday and Sunday are primarily the Day Cars turn mainly because I still have to build it and get the uvs sorted on that for me to finally be able to move on. I may have to focus less on the environment as I was going to but Ill put something together in the spur of the moment...

Anyway lets get down to the nasty UV Mapping :P


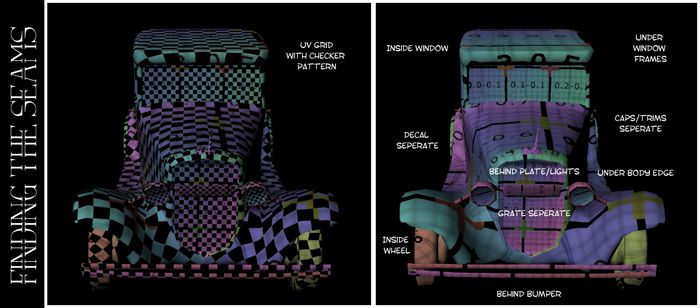
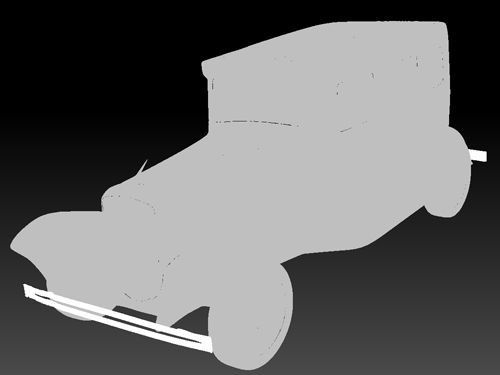
My "Finding the Seams" image is mainly about where I placed the edges of my UV Maps as everyone knows it is advisable to hide them as best as one can. I found myself breaking the model into lots of parts to make it easier to colour. I will probably re-join it all once I have the texture and normal laid out over it. I have been playing with ambient occlusion baking as well to provide my model with a little extra light depth. I am learning as I go but so far I think I have the battle plan going forward...


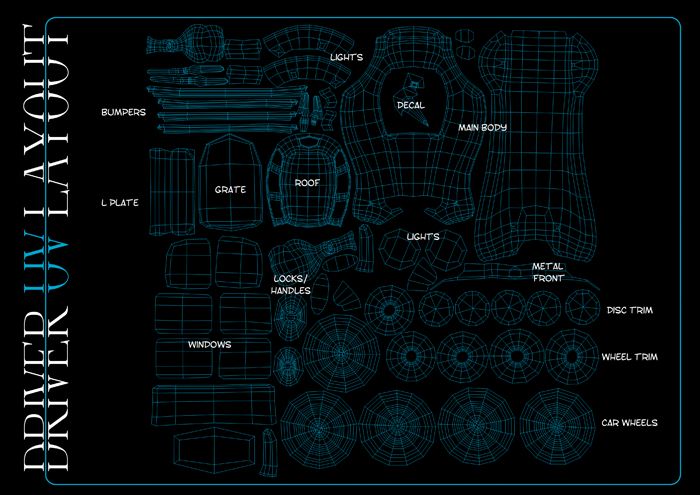
Next comes the inevitable ZUV layout mainly because I think its cool to be able to see your geometry transform into the UVs. This is quite a cool way of seeing what is what just in case anybody was wondering. I have learnt a number of things by going into ZBrush for this project and I have some understanding now of the order of events. Basically its a foundation you cant just bring an unwrapped model in unless you want aggro. The model needs its UVs and ideally it needs to be one mesh so you can divide it. You then poly-group the mesh into parts in ZBrush and reattach them later in Maya.


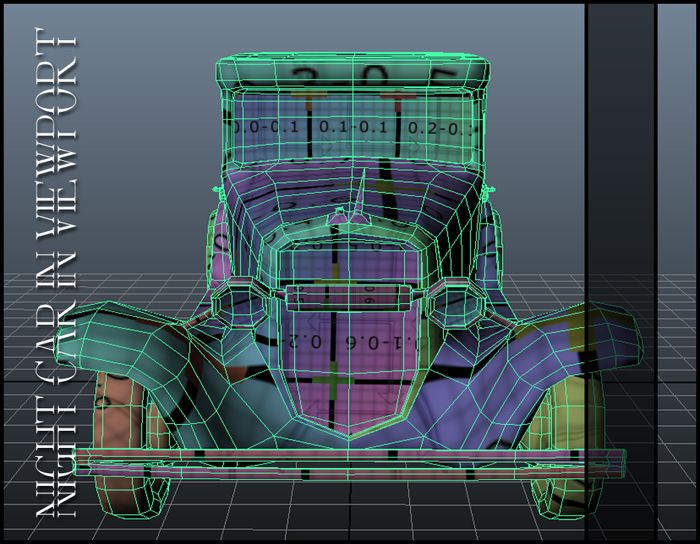
Next comes the car in the viewport just for people to ogle at really the viewports range very differently between Maya and ZBrush. More importantly you have to take every material in ZBrush with a "pinch of salt". Its an illusion and you cannot export it which is why things tend to look weird when you bring them from ZBrush. Ultimately I think the real trick here is just a learning process like anything. The car wrapped quite nicely though as you can tell from the seems, there were issues in getting some parts to listen there was constant overlapping...


Last but not least the UV Layout in all its glory, I think its quite fair to say that this one is a bit more crowded. I prioritized the size of the body mainly because that's the first thing one draws their eyes to. The car wheels were also bigger then I had originally planned mainly because I wanted quite a bit of rust inside there. I think the geometry that took the longest was the door handles and bumpers purely because the Geometry refused to unwrap without overlapping itself. I think I spent a day on one bumper and a door handle that's how long they took...

This car has been a bit of a love hate relationship and I have to go over it again. I think the painting will be enjoyable now that I know I was doing everything wrong before. I will also take these final few seconds to inform people who viewed my "Stage 3 Concept" post to tell them that that rendition of the night car was a Concept. This in no way reflects how the final model will look once I have it doing a turnaround in Maya. For those of you that know me know I love Dark Concept its my thing and there was a range of colour in there. Personally I liked the concept it produced... It didn't work against a bright background so that's a given.... but I liked how the car was coloured.

Well I have a few other posts to knock up so I will love you and leave you.
xXStItChXx

Tuesday, 23 April 2013

Unit 9: Adaptation - Stage 3 Concept "Night" Car Weta

Hello Everyone,

Been working on finishing the Night Car over the past few days and I still have a few little bits to fold away after this post but I think I will be able to meet the deadline. Yesterday was my duty to texture and dirty up the night car. As I am sure many of you already know from the staged concept phases. In terms of the Stage 3 I wanted to keep things quick hence I decided to make my final stage for any and all Stage 3 Concept a multi-pass render from Zbrush. I'm not being funny but it's just a quicker way for me to get a decent output then wasting a day or so drawing it.

I am working to the strengths of my skillset to have a quicker workflow and I have a few things I want to post before the big Crit Day. I will take this opportunity to say that there are lots of Render passes involved in this Weta design. This does not mean I am going to sit there and render each one out for a video. A lot of these materials do not port into Maya so this post is merely just to conclude the conceptual Stages of my models. I spent a lot of time rusting up this car yesterday as well as trying to give every surface a texture so it is not "too smooth".

Anyway lets get to the interesting content!!


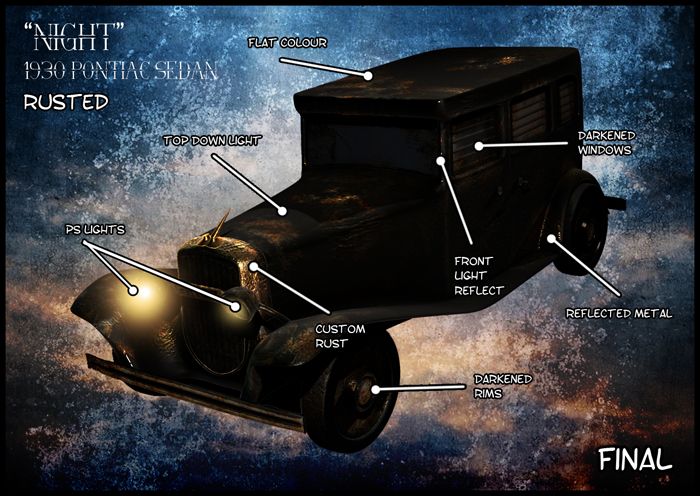
The image above shows the final stage of my Weta Pontiac "Night" car. A lot of work went into putting rust into it and adding dirt so it wasn't smooth. For these I had to use a rust texture on a custom brush which was set to a custom alpha scatter brush. The brush also had to create deformation so I switched it between zadd and zsub which uses the alpha to create actual deformation into the high resolution mesh. There were also a number of custom materials used to get the look of the car what I considered to be "right". The lights were a last minute Photoshop addition.


1. MASKING

The masking stage for an object other then a human can be quite tiresome mainly because you have to break the geometry and for some reason I couldn't port it back and forth to Maya easily. I therefore had to do all the breaking of the mesh in Zbrush using the masking and poly-groups tool... Something which was a welcome surprise once I got the hang of it. I often wondered why some meshes when you ported them to Maya were in pieces. Now I know that they wasn't' they were poly-grouped and you can just as easily combine and quick merge them to become a single mesh again...


2. BASIC RENDER PASSES

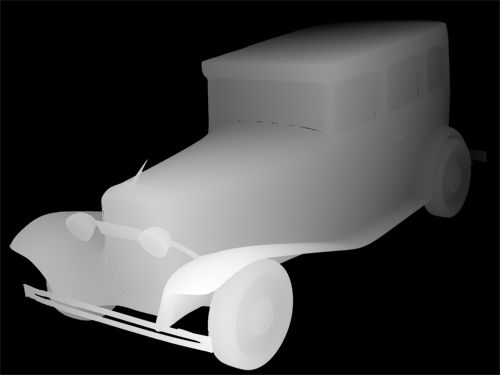
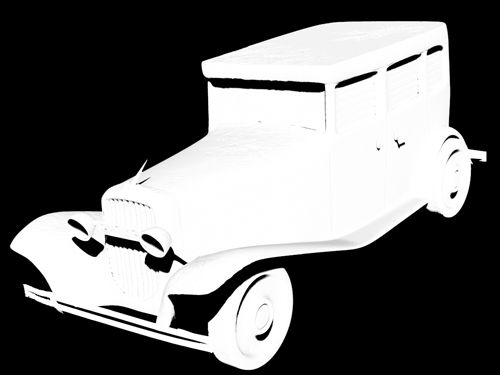
My basic render passes are generally what are considered to be the standard especially as ZBrush renders these out automatically for each BPR render it initiates. The diffuse is a little different as you have to render what is known as a "flat" render just to get the colours on the mesh. The other reason for the division of the mesh was to make it easier for me to paint too. Basically most of it was just a case of me filling each segment with colour. The Ambient Occlusion and the ZDepth in addition to Shadow were also used in multiply and overlay capacities within Photoshop.


3. LIGHTING RENDER PASSES

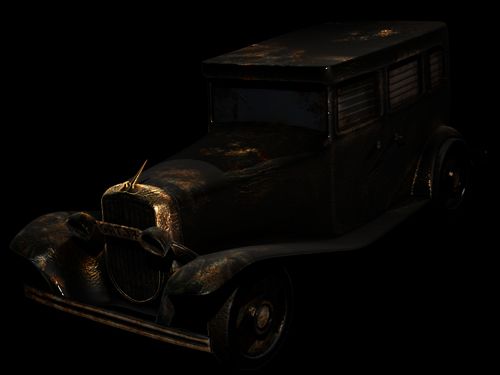
Next came the Lighting which I knew had to be quite dynamic, for this instance I did 4 passes total two from above one from a front low and one from a front high. The two from above were at slight varying degrees too but the one that ended up becoming more interesting to me was the one that was more to the side. The others felt a little too over exposed but I managed to drop them in under my primary light pass. What I was aiming for mainly was reflections its also why the materials are slightly different between them also.


4. PUTTING IT TOGETHER

When it came to putting it all together I had to go and start cutting through all of the underlying masks with the big top mask which would remove the shape from the background. After doing this on every single multi pass render layer I put it blended it all together getting the results above. I then went in search of a texture which I felt suited the mood a little. Again I'm not really sure about the texture because it looks quite nice against a black backdrop. Still I thought I would give it a try and post this up anyway, but yes this is what concluded the journey.

5. BREAKING IT DOWN


Final touches done in Photoshop aside from blender modes was quite minimal really. The design probably the most fundamental. The lights were added to the concept but in Maya I plan to simulate them with real lights. Custom rust was used all over the car particularly in the crevices of the car. Some of the other metal including the rims was too shiny so I had to darken those down with a less reflective material. You can see the overhead lighting particularly well and the highlight zones are from the front lights which are more focused towards hard lights.. This shows its made of metal at the very least.

I have learnt a few new tricks in ZBrush thanks to this little car so that's a nice thing to know. I find it particularly handy that you can assign textures to your brush and then scatter them with custom Alphas. It really does make a unique coating if you have the time to do it that is. If I'm a little unhappy with something its most probably the front window... Did not know what to do with it really, I haven't built interiors in this bad boy. It would just eat up more time that I don't have and add more polygons to my overall count and I'm trying to keep it low...

Anyway that concludes the Stage 3 concept... For the Night Car. Hopefully I should have this car wrapped up by today so wish me luck on that guys...

Take it easy!
xXStItChXx

Friday, 12 April 2013

Unit 9: Adaptation - "Night" Car 2D Turnarounds to 3D

Hello Everyone,

I been cracking away had a really good growth spurt tonight to the point that I think the Low Poly Night Car is almost done. Either way I have disengaged the image planes I just have a few other little bits to do really... but they are mostly details. Anyway I knew one post that I could put up the translation from the 2D image planes to the 3D geometry just like I did with Driver a few posts back. I am following a trend here and everyone knows how I love harmony ha-ha. Anyway I thought I would get ahead of the game a little here... I have my essay creeping up for Sunday.

Anyone who has been following these posts intently for whatever reason should know there has been a love hate relationship with me and cars. I guess posting the "Stage 2" concept for the "Night" car just gave me that little push I needed to get the final details etched in and correct in the terms of edge loops. I model is slightly higher then I had wanted but I figured 5000 poly was acceptable for a model this generation. Of course if I am incorrect there I am sure Alan will tell me to chop bits out if he deems it too high. The final Poly rests on the quality of Driver a post I hope to do tomorrow...

Well there is no time like the present please step into my office!!


The 2D profile of my "Night" car was a stroke of genius on my part, it took bloody ages to get this correct the front as you can imagine was the most complicated. Having no use for a close up side view I decided to throw in the cars scale compared to Driver the base for all of my models. I'm not 100% on the scale of the car but from researching images I think it is pretty close. When I made him taller then the car it looked as though he would barely fit in it. Anyway the details are yet to be etched into the model but the low resolution is there it just needs.... UV mapping DUH DUH DUH!!!!

 photo NightCar3DModelSilhouettes_zps1524311f.jpg

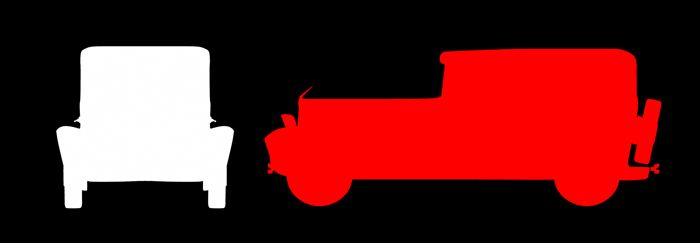
The silhouettes were created by the models mask once I subdivided it a few times, these ones were not drawn by me. To be honest I didn't know where to begin when I was sketching the turnarounds, I couldn't imagine what the silhouette would look like so sorry there. Either way I thought it was justified to post about them. Personally I think its silhouettes demonstrate an old fashioned car perfectly... this model is actually a big success for me. I never thought I would be able to do cars but look at me 1 down and only 1 model to go till I have reached my brief.... WOOP!!


This is actually what the model looks like with the turnarounds cast under the original line art. I managed to get them pretty close. For the hell of it I also did my very first group hug for the Driver and his "Night" car. The model is slightly out of the lines for some of these images but I will not let that bother me here. It looks better this way especially from the 3/4 angle. I removed the head chart as it was completely invalid here really. The car does not have a head so I cannot really scale it from that. You will just have to do as I did and compare it to Driver who is 7 Driver heads tall.


Last but not least the "Night" Car planes to Model, c'mon you really didn't think I wouldn't show you the model on the day of its birth? Shame on you... Its very blocky and can probably lose some detail in the less popular areas but for the most part it is there. I haven't looked at it in ZBrush yet but I will probably save that for when I can sit down and do some proper high resolution detailing. I still have the Driver to think about mostly for tomorrow, when I will be showing you a few nice little bits and pieces that I have been learning from the legend of ZBrush Scott Spencer.

Anyway I think I have hit my quota for today, quite beat actually and its nearly 4am so I think its a good time to call things here with a nice success story. I hopefully will have a few things to show you guys tomorrow, at least I hope I will. The modelling phase can be a tricky mistress and after the other day there were a few little mishaps. I won't go into it but learning a new thing can cause the odd issue and ZBrush can be a little unforgiving if you don't treat it right or throw a toy out of the pram. Still I have a win now so hopefully things will be on the up and up from here :)

Take it easy people!
xXStItChXx
Unit 9: Adaptation - Stage 2 Concept "Night" Car

Hello Everyone,

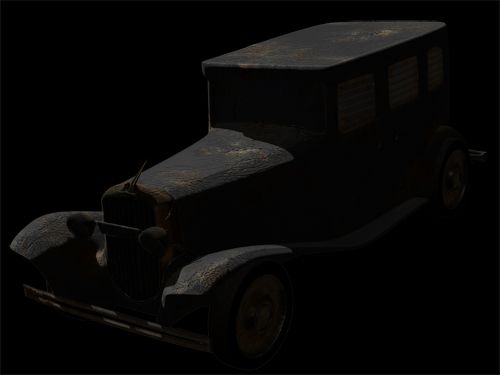
Got a few updates coming today I'm just dotting the I's and crossing the T's this is one of the completed ones. Something I had meant to do a long time ago but my own internal fear of cars got the better of me. Suffice to say I have that in check now so hopefully the "Day" cars Stage 2 will not be too far behind this post. Erm... this past week has been attributed to the "Night" car primarily with a bit of further development on Driver thrown in for good measure. Suffice to say things are coming along quite nicely with it all I'm just trying to get textures sorted and thus their UV's...

You will be pleased to hear that I have begun modelling the night car which has been coming on leaps and bounds (a lot quicker then I had anticipated). My main dilemma has been with removing triangles which I know is not an issue in a games mesh but old habits die hard. I want all of my mesh's to be pristine from the low level so I have the option of creating nice subdivides. For those of you that do not know subdividing triangles completely screws over a mesh - one of the reasons its advised not to use them. I know it shouldn't matter for games but what can I say old habits.

Well the next thing to do is post my usual accompanying content - Enjoy!

I started off with picking my favourite from the original base forms I designed in the Stage 1 Concept phase. These were of course derived from rough sketches done periodically by me on various occasions. From this proportion I really loved the higher roof the smaller lights were a little bit of an oversight but I don't know things just made more sense with this version. I particularly loved the wheel base and it made the entire thing feel like a mobsters car... This is something I found interesting when I considered that this vehicle is actually a second hand car...It gets good...

From this I made 3 variants based on the original primitive design only this time adding some additional detail. Fig 1 was my original take on the car but from research I found that most of these cars didn't have horns or wind side mirrors... and then I thought would Driver really need them if he's that good? Hell no... Plus what would he need a horn for? he's meant to be stealthy So I took them off. making this about the car only.

Figure 2 was based on my need to make the car old I wanted rust but I went overboard... I added a custom built make shift cast iron window protector for the Driver side window (largely based on the film - "The Punisher") and completely fell in love.

This brought me to Figure 3 I removed some of the overbearing rust and kept it to areas which are most likely. Mostly crevices which can fall victim to water build up. I added gunshot holes in the windows to show the experience of its previous owner more so then the Driver himself. I even thought about blacking one of the lights out... Of course I changed my mind with the light viser.
Anyway from these chosen variants I decided to have a little fun and make it out to be some kind second hand car sale. This is when I started embracing its previous owner a little more giving the car some depth. I kept rust in key areas and kept a hub cap removed, I also deemed it appropriate to knock out a light... just to keep the car from looking too pristine. I remember my initial conversations with Alan were about the car not being a show model. Its old and rusted much like the reference imagery on my Stage 1 post for this car...
At this point I couldn't resist animating the car a little. Just by getting my point across about the side metal grates. Now I know its 1930s but the window protectors are make shift... low tech manual sliding. Adding these makes it a little more then a car... its an iron box. It also makes the car special but special in a way that is not obvious. When the police show up he could slide the window protectors up and no one would be any the wiser. They hide in plain sight that's what makes them brilliant. The car now has personality and a backstory and of course a nice bit of customisation for a 1930s period.
Next comes the Car Detail colours which I divided into colour zones allowing for easier customisation later on. Now one thing I realised here is that I am by own reference calling this car "Night" so the obvious move is to hit for Dark Blues or Blacks. I threw in a red just to test the water and a purple for good measure still I wound up preferring D. B being a very close second. I guess I wasn't shooting to have something that adopts a cliché but sometimes they work and for good reason. Besides I just love dark colours and those of you who know me know how much.

So there she is in all her glory, of course it wont be that pristine on the model or when I get the final stage concept of the car complete (very soon). I like how it feels slightly off balance too it really does make me feel as though we are driving something that is not perfect. This car has to have a history and has to essentially be a person itself. I mean look at "Grand Theft Auto". I mean really who cares if they are driving a sports car if you are not going faster then the other cars? You would be happy driving a van if it went fast its because the cars have no identity and you throw them away... why? Because you don't care about them...

All of this preaching aside I am actually enjoying getting a chance to work with this car now I know what its about. Its like anything when something has no identity you do not enthuse in it from the first jump. You have to make it interesting to yourself and then hope that other people will find it interesting for those reasons too. I personally don't do cars, never found them interesting which is why Driver got so much attention. Now though these cars are starting to work their way into my interest I'm not sure what the day car will be like yet... gonna have to make that interesting too :P

Hey Ho!
xXStItChXx

Monday, 8 April 2013

Unit 9: Adaptation - Time Management (Part 3)

Hello Everyone,

3 for 3 so here we go. Time management Part 3 can't believe I'm here already seems not long ago I was posting 2 but I was only 5 weeks ago. Deja Vu or what? Well I won't lie things began really slow at the start of this brief especially when considering my own disinterest in cars. Still I wanted a challenge and I defiantly got it I just have to keep pushing forward and I will crack as many bones as needed to reach my goal at the end of these next 4 weeks. Now I know it says 11 - 15 but I was away for that week helping my mum with the house and other bits and pieces... so my bad.

Still it's not that I was doing nothing that week I was just doing less then I otherwise would have. You would not believe the amount of sanding and wallpaper stripping I have done urgh. If my dad could see me now he wouldn't believe it. Anyway onto project talk, things are coming along with the Driver who I'm hoping to have done in the next couple of days then I can focus on getting the cars finalised. I don't envision that taking too long. The cars are much more blocky then him meaning I should be able to take advantage and get ahead of the curve enough time to start putting other bits together that have been swept to the side (Concept Art for example).


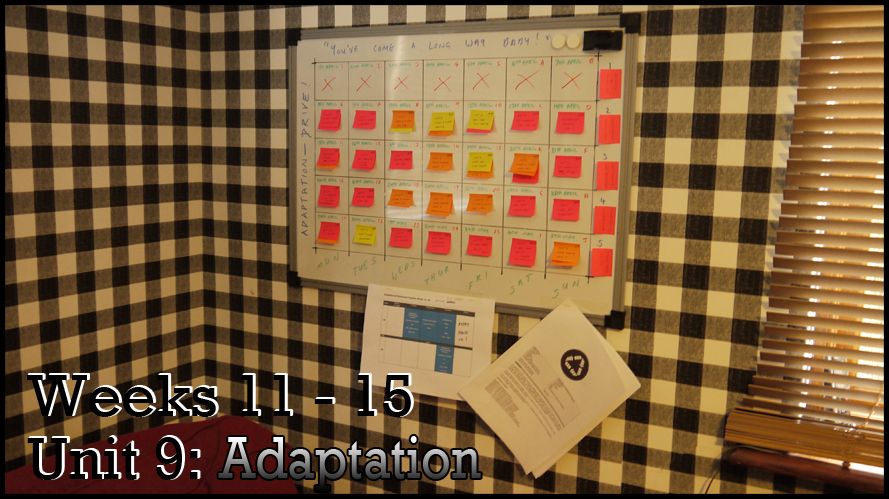
I have managed to be much more strategic with my post it notes this time I just have to keep the snowballing effect from hitting me and causing a delay in work. At the moment as long as I achieve one a day I am still holding the ball. The real thing which is suffering at the moment are my Maya exercises so I am going to have to screech things to a halt just to step back and knock a few more of those out. I have included them on the board but they are a nicety I will not prioritise them over the project being completed. But I will do my best to get as many as humanly possible.


That's another 5 weeks that I am holding in my hand just in case anyone was curious. I am kind of wishing summer here because it is freezing out there. My room can catch a draft too so Imp usually freezing while working. Anyway the project is coming along and if I have to I will miss a bit of sleep so I can make sure everything is squared away. Today was a little bit of a detour as I have this tendency to go beyond the brief especially if something doesn't look right to me. Its a total curse and I hate it but I guess I do it that way for some reason - maybe because I'm an idiot lol.

After this brief we have 1 year left and its game over I have to be out there looking for my place in a saturated market of games enthusiasts. Still at least I have a few scars to show any curious employers. I will be seeing the majority of you people about no doubt and if any of you have any influence to games developers put my name out to them I will love you forever. The next thing on the docket after this brief is our year long project with Sammy and Chrissie, looking forward to it will certainly be nice working in a team again... I kind of miss Anita and Lydia and good ol Smoke Stack ha-ha.

Anyway wish me luck!!
xXStItChXx
Unit 9: Adaptation - Driver Low Model Complete

Hello Everyone,

Me again yes immediately after my last post but you know I am a person of habit so please just indulge me my 2 tandem posts. Now I know what you are thinking another post about modelling? Are you insane? The answer is yes but I wanted to wrap it up properly and label this as the end of my low poly modelling campaign for Driver. I will be taking him to a higher subdivide (to the tune of a few million poly) and mapping the details down onto either his low form of a Sub2 form which keeps him at the rather acceptable level of 14, 000 polygons. Not sure just putting it out there.

Regardless I am hoping that the next few images I post will be about him looking amazing at a higher divide and it will be even more epic if I can project that on his lower form. I have been doing lots of research into poly counts so I thought I would also post a bit of that onto this post so people can see I am thinking about what kind of mesh I am making here. As I said before the Beauty of low is that you can bring it higher, having a high mesh from the start means its a nightmare to bring down unless you take it into Maya and start chopping out edge loops by the fist load.

Either way I am now in a good place to make this mesh amazing!

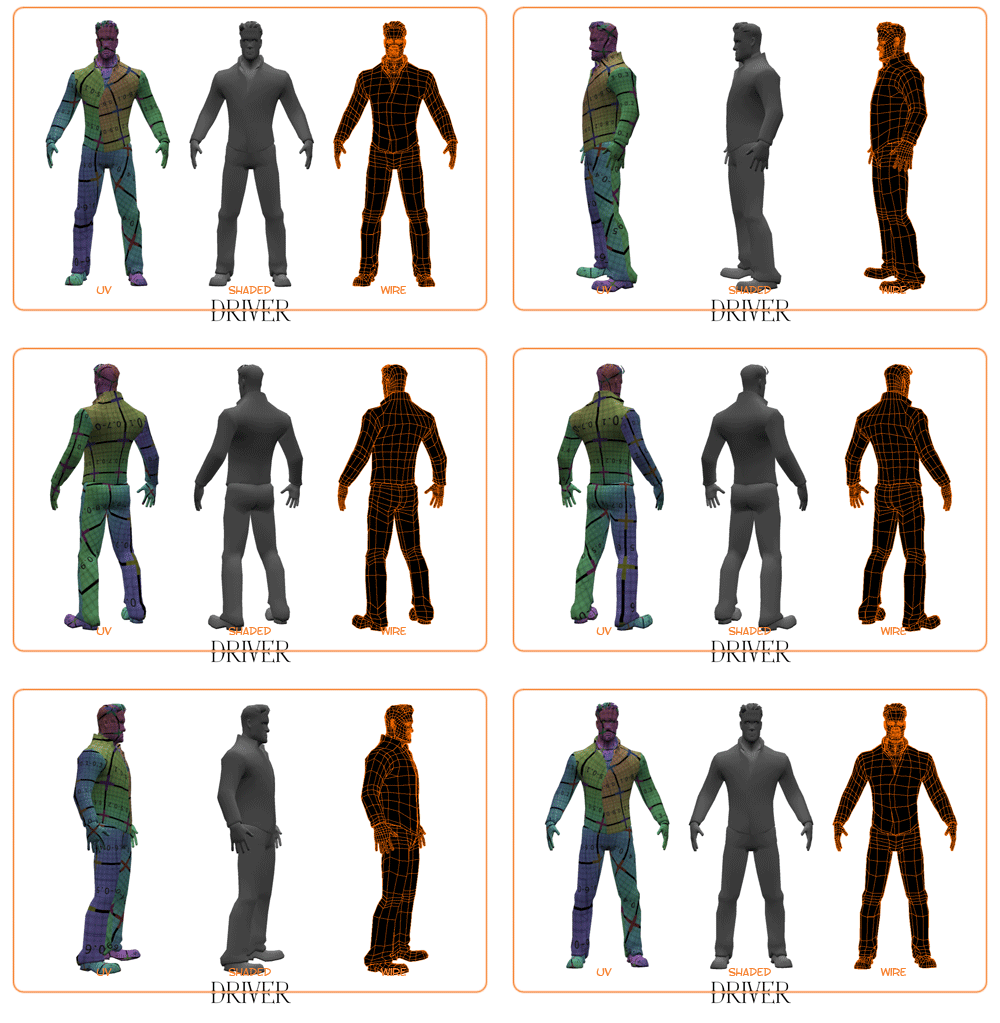
My final low poly Driver is above, and yes it is moving well particularly 3 different renditions of it are moving. People know of the UV Grid variant and the Shaded variant. The wire is a projection of the mesh onto itself using Mental Rays contours. If you Google rendering Wireframe it will crop up in one of the first 2-3 entries. I got the animated gif idea from Joey as I know she has done this for all of her 5 cool little dudes. I guess I took it a little far like I tend to do, will probably make my blog an even longer load for those of you on slow connections (like me).


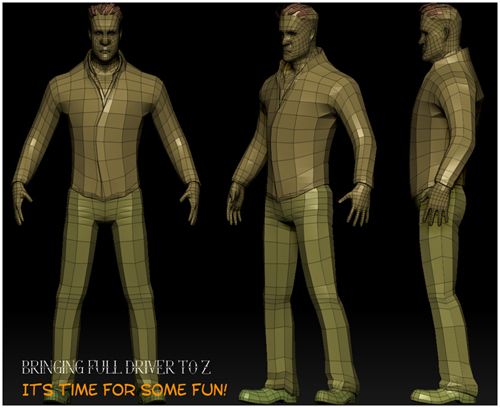
The "Bringing Drive to Z" image above was just my way of illustrating the different groups with this you can see how the mesh is separated. Notably the hair and the jacket being separate from each other and the eyes and the shoes from the trousers. You can actually divide the groups further in ZBrush using the mask features. Its sort of the equivalent of the mesh Combine/Separate in Maya only this does it in the ways of masking not individually selecting polys or vertices. You can soften, grow, sharpen and blur the masks to get degrees on intensity... Very cool piece of kit.


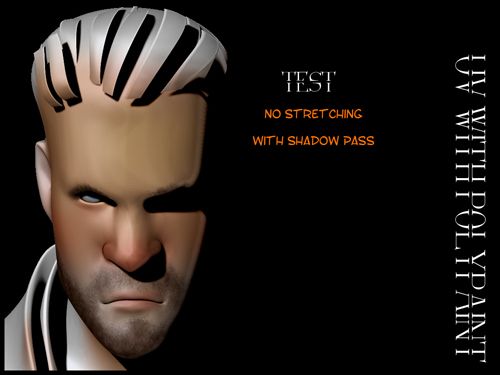
While I was in Zbrush I had a very quick play with the poly painting just to see that there was no obvious stretching on the UV's particularly around the lips which is where I usually get problems. Then for the hell of it I had a little fun with some stubble and render passes. Literally 10 minutes but it enabled me to confirm that the maps are working and when divided he still looks pretty bad ass especially at 5 million poly *gulps*. I may have to reframe from enabling smooth when I divide it as you can see it causes the mesh to retract some... Another thing to consider.


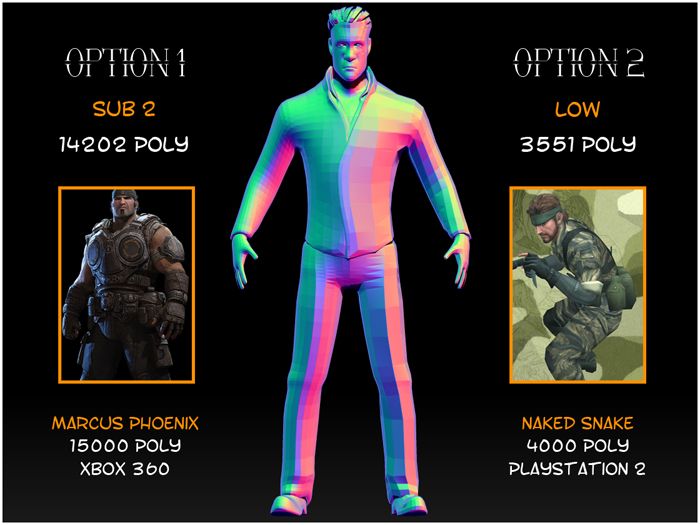
I also knocked up a quick video in ZBrush of the poly alternatives that I am considering. Where as my default (Subdivide 1) stands at 3551 polygons my Subdivide 2 stands at 14,202 which is current generation graphics. At this point I have the option of keeping it at the bottom or moving it up depending on where I want to put it. I was rather set on aiming it for current generation but then I am not sure if I can get better normal maps then it may be worth considering keeping it to its low 3500 base limit. I'm not a mobile gamer so that's not something I want to consider really.


The image above shows my available options if I divide again I could take it into the next generation polygonal levels (Playstation 4 and the like) sitting at around 30 - 70,000 polys for game characters. This is what I will decide once I have crafted his higher detail levels to see which I prefer on which sub divide. It would be nice to keep it very low just to see what kind of results I could achieve but I'd want him to retain some of the higher details I place into his mesh. Normal maps are okay but I've never had one work perfectly before something usually goes wrong.

I know its quite confident of me to be comparing my Driver to 2 of the most Iconic games characters around but I am aiming to work with the best so why not ha-ha. I have quite a bit of work to be cracking on with if I want his high resolution details to be effective. Of course I'm worried that the normal will have an issue carrying over. I couldn't even get them working at acceptable levels on Charles. I guess these are just more questions for Alan I just want to retain as much detail as possible so he can look totally amazing in all cases. You know me anything short of perfection usually isn't good enough lol.

Later people!
xXStItChXx