
Me again yes immediately after my last post but you know I am a person of habit so please just indulge me my 2 tandem posts. Now I know what you are thinking another post about modelling? Are you insane? The answer is yes but I wanted to wrap it up properly and label this as the end of my low poly modelling campaign for Driver. I will be taking him to a higher subdivide (to the tune of a few million poly) and mapping the details down onto either his low form of a Sub2 form which keeps him at the rather acceptable level of 14, 000 polygons. Not sure just putting it out there.
Regardless I am hoping that the next few images I post will be about him looking amazing at a higher divide and it will be even more epic if I can project that on his lower form. I have been doing lots of research into poly counts so I thought I would also post a bit of that onto this post so people can see I am thinking about what kind of mesh I am making here. As I said before the Beauty of low is that you can bring it higher, having a high mesh from the start means its a nightmare to bring down unless you take it into Maya and start chopping out edge loops by the fist load.
Either way I am now in a good place to make this mesh amazing!
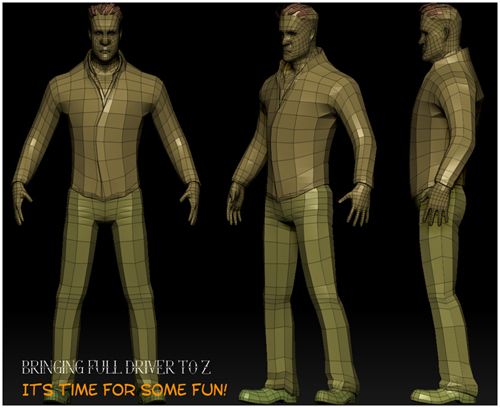
The "Bringing Drive to Z" image above was just my way of illustrating the different groups with this you can see how the mesh is separated. Notably the hair and the jacket being separate from each other and the eyes and the shoes from the trousers. You can actually divide the groups further in ZBrush using the mask features. Its sort of the equivalent of the mesh Combine/Separate in Maya only this does it in the ways of masking not individually selecting polys or vertices. You can soften, grow, sharpen and blur the masks to get degrees on intensity... Very cool piece of kit.
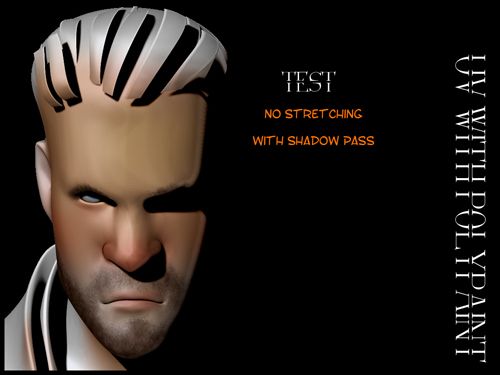
While I was in Zbrush I had a very quick play with the poly painting just to see that there was no obvious stretching on the UV's particularly around the lips which is where I usually get problems. Then for the hell of it I had a little fun with some stubble and render passes. Literally 10 minutes but it enabled me to confirm that the maps are working and when divided he still looks pretty bad ass especially at 5 million poly *gulps*. I may have to reframe from enabling smooth when I divide it as you can see it causes the mesh to retract some... Another thing to consider.
I also knocked up a quick video in ZBrush of the poly alternatives that I am considering. Where as my default (Subdivide 1) stands at 3551 polygons my Subdivide 2 stands at 14,202 which is current generation graphics. At this point I have the option of keeping it at the bottom or moving it up depending on where I want to put it. I was rather set on aiming it for current generation but then I am not sure if I can get better normal maps then it may be worth considering keeping it to its low 3500 base limit. I'm not a mobile gamer so that's not something I want to consider really.

The image above shows my available options if I divide again I could take it into the next generation polygonal levels (Playstation 4 and the like) sitting at around 30 - 70,000 polys for game characters. This is what I will decide once I have crafted his higher detail levels to see which I prefer on which sub divide. It would be nice to keep it very low just to see what kind of results I could achieve but I'd want him to retain some of the higher details I place into his mesh. Normal maps are okay but I've never had one work perfectly before something usually goes wrong.
I know its quite confident of me to be comparing my Driver to 2 of the most Iconic games characters around but I am aiming to work with the best so why not ha-ha. I have quite a bit of work to be cracking on with if I want his high resolution details to be effective. Of course I'm worried that the normal will have an issue carrying over. I couldn't even get them working at acceptable levels on Charles. I guess these are just more questions for Alan I just want to retain as much detail as possible so he can look totally amazing in all cases. You know me anything short of perfection usually isn't good enough lol.
Later people!
xXStItChXx
well done, Stitch - keep it coming (and lay off those energy drinks, do some exercise, get some fresh air, eat your greens etc.)
ReplyDelete