Hello Everyone,
Now begins the gradual completion of the Day Car, I want a little longer with my Driver before posting him up hopefully by Saturday or Sunday. Now anyone who has been following this knows that "Stage 2" is actually the last of my researching stages as it depicts any last details and colour. A final detail rendition is made and with it a final colour choice is made. By doing this for each of my models I have the colours for my final colour pallet post which will follow this one closely. The "Stage 3" is a concept which I have elected to do in high definition render passes from ZBrush.
This post will begin with a chosen primitive form from Stage 1 which is basically just the components of a car broken and exaggerated. This allows me to create a different car by exaggerating its various features (I.e. headlights made slightly bigger, etc). This allows me to make something a little different from the normal standard design. In the case of the day car the details are mainly smashed/folded metal. This is largely because the Day car has been used in 2 stunts which has substantially caused the suspension to destabilize and the front to be severely dented.
Okay so, lets get down to the very last Stage 2 post for Unit 9!!
It was decided earlier on from talking with Alan that I would create cars that were not perfect like in games such as "Grand Theft Auto". These cars have a story to tell, they are not just some run of the mill pick up and drop skin on wheels. The Night car has personality due to its former owner and is covered in rust due to it being second hand. The Day car has personality due to its range of damage which is caused by the Driver in the third chapter of the game. He is instructed by his boss to make an example out of an expensive car... and he does so.
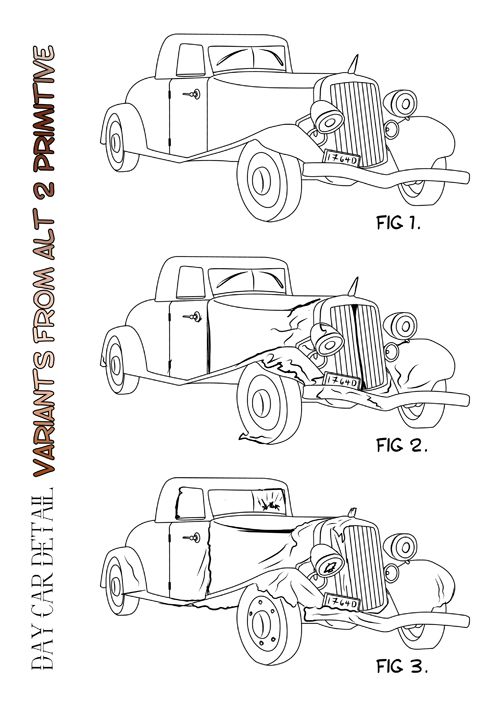
The image above (Day Detail) is the expanse of the detailing for the "Day" car. Fundamentally the anatomy of the car is based on the early primitive. The wonky lights are what would happen in a crash. The same as the bent frame on the front of the car illustrating a head on collision with something. I also thought it would be cool to put a bit of a dent in the front window where someone could have smashed their head. Probably from all of these Fig 3 resonated the most. I felt the windscreen wipers were a little much. The wing mirrors were also not on reference images I found of this car so I kept them out of it...
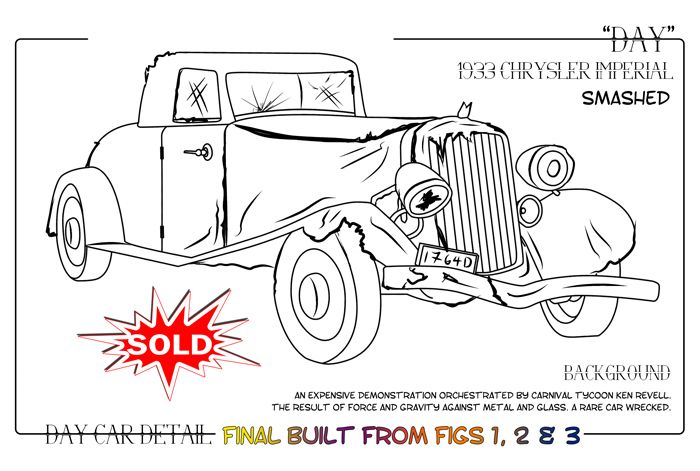
The final image (above) is basically built from my favourite parts from the other 3 Figs above. I liked the idea of the bonnet slightly broken. The front of the car severely ruffled with the front grate slightly smashed. The broken headlight I adopted from Figure 3 also along with the broken front Decal which is similar to the Night in that regard. Making the car look dented was a case of ridding lots of the smooth edges. I also elected to keep the spare tire on the other side with this side being devoid of one... Perhaps it got knocked off during the head on collision who knows...
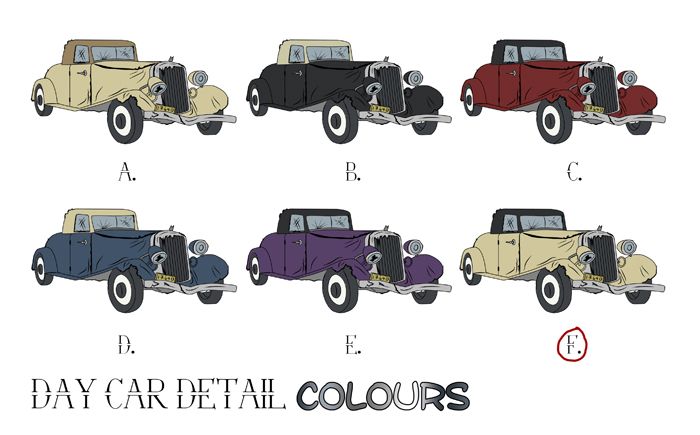
Next comes the colour variants, a necessity to deciphering my final colour pallet's for each model. The only goal then is to differentiate the shade of the colour to show depth, this is also done with the ambient occlusion map which is baked into the eventual texture of the model. Anyway from these colour variants I really did like A & B... even C was a surprising combination that worked. Still I found myself falling back to A which I used to combine with the colours of B to create E. I wound up preferring this, plus it said Day to me more so then the others...
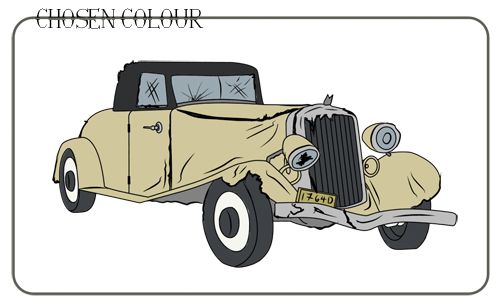
Well last but not least is a bit of a closer look at the chosen colour on its lonesome. The other colours were not altered as much mainly because from reference imagery the only painted components were the main body and the roof. The Chrysler Imperial has pretty cool looking wheels too with a kind of white trim. I think the wheels are my favourite part of this car but the slender built is also quite nice. In many ways it is the complete opposite of the Night car which is kind of blocky. Its also much easier to keep low poly due to the lack of windows... Another advantage.
This concludes the final developmental stages for the Day car. People that know me know that I love a structured approach to anything so its nice to have these developmental steps as "Stages". I don't like having to think of a million and one ways to do something. I do a few experiments and then I commit besides its not like we are given forever to find the right way to do something. This Unit has been the first to truly commit to this "Stage" process of mine and I have to say I am loving it. Anyway I will see you all in the next post and no doubt beyond that!!
Take it easy everyone!!
xXStItChXx

No comments:
Post a Comment